by Narmina Balabeyli
Updated:
5 min
Most Shopify merchants have blogs that are simple, lacking inline elements such as products, CTAs, banners, and social media posts. This, in turn, makes blog posts unattractive and boring to consume, resulting in less reading time, higher abandonment rates, and lower SEO scores.
The common diagnosis may seem as a bad design, but the actual problem is deeper: Shopify's blog editor has very limited capabilities. Best you can do is insert an image, video or table.
Shopify blog limitations
Yes, there are real constraints. Here's what they actually are.
Design and layout limitations
The default editor is basic. Creating rich layouts without coding is hard.
Individual blog posts don't fully support drag-and-drop sections the way product pages do.
Adding image captions requires custom code. Images in general are a pain to manage.
Structure limitations
The URL path is fixed:
domain.com/blogs/[blog-name]/[post-title].No native categories, only tags, and this makes it hard to organize large amounts of content.
Embedding products into editorial content is technically clunky without apps or code.
SEO and analytics limitations
Built-in SEO tools cover the basics. No content analysis, no readability checks, no real meta-tagging control.
Analytics are shallow. You won't get scroll depth or conversion data from native reports.
Customization limitations
Anything beyond theme settings requires Liquid (Shopify's templating language) and CSS.
Most of the content features like related posts, table of contents, interactive elements need third-party apps.
A blog without those elements feels disconnected from your business. Good blog design bridges curiosity to conviction. And, every moment readers spend searching for the next step is a moment they could leave.
What your Shopify blog design actually needs to do?
Good customization, relevant blog page blocks and elements builds a confidence bridge. It's the experience of moving from "this was helpful" to "I trust this brand enough to buy."
That means:
Products embedded naturally inside the content, not slapped at the bottom
Internal links that guide readers toward related posts or buying guides
A reading experience that feels as intentional as your product pages
4 Levels to Customize Shopify blog
Your starting point depends on how much control you need.
Level 1: Theme Editor (no code)
Best for merchants who want a cleaner layout without a developer. From the theme editor, you can change only the blog page layout. It won't let you change the blog post section itself and how content flows inside a post.
To change the blog page layout, go to Online Store → Themes → Customize, then use the dropdown to switch between Blog Index and Blog Post views.
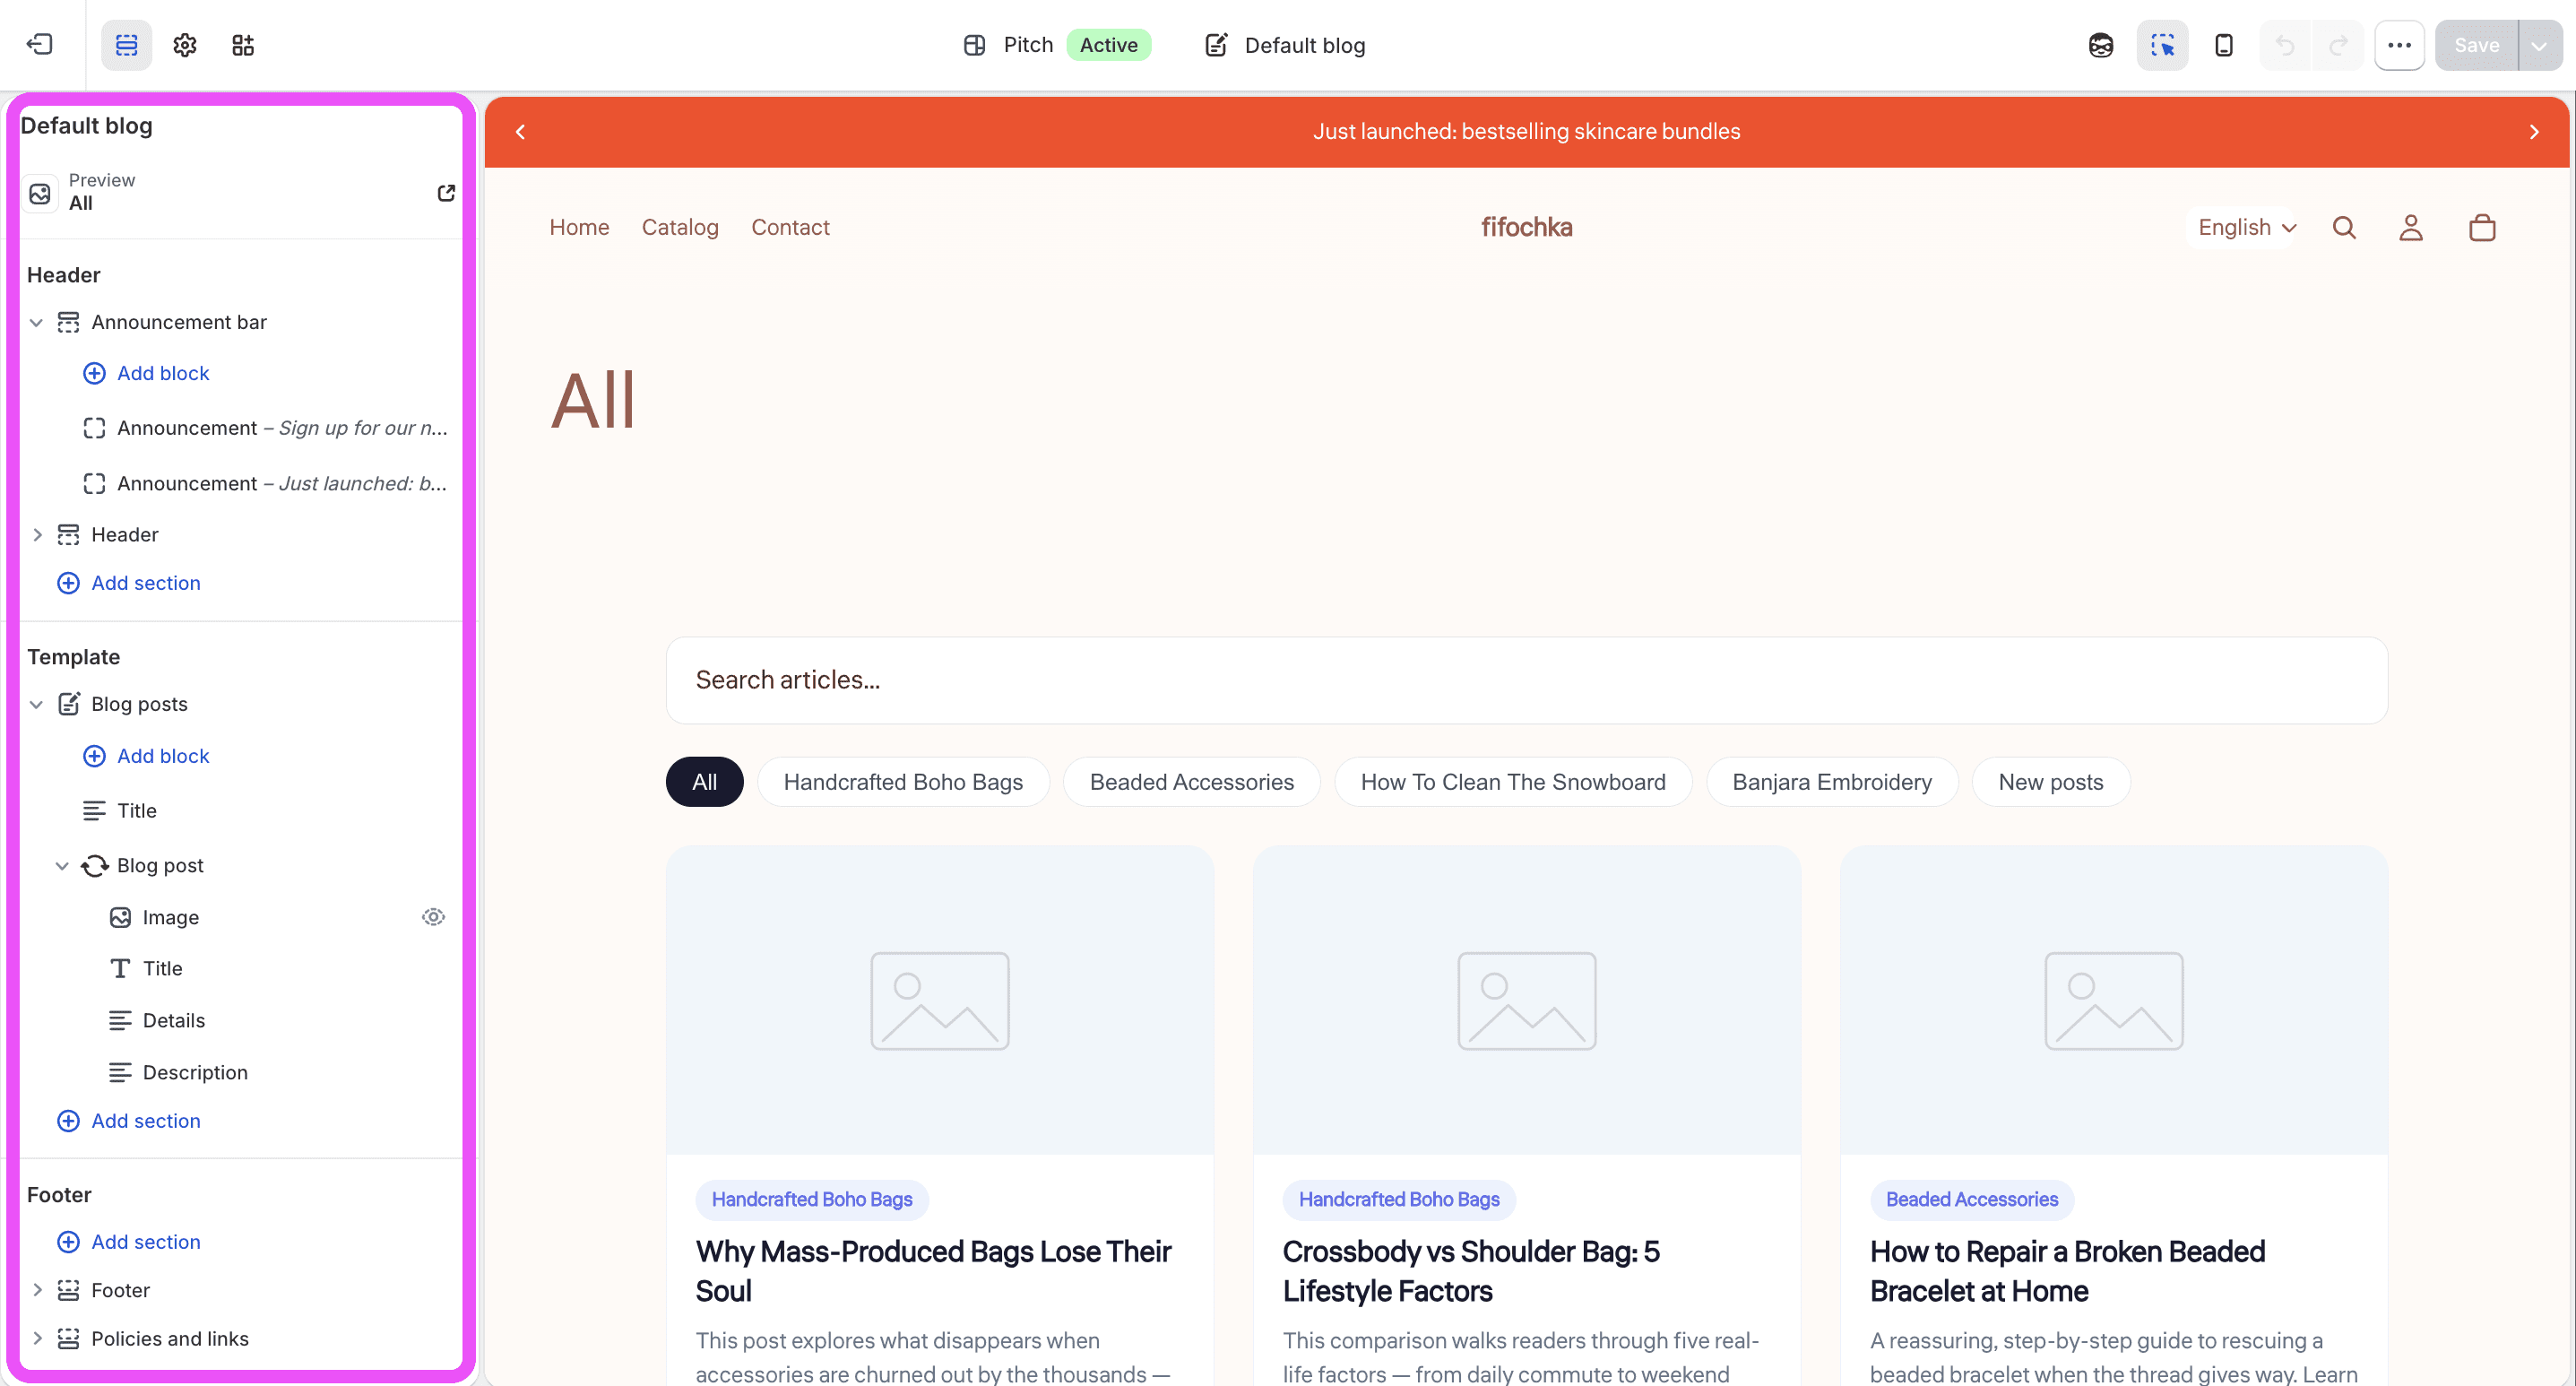
What you can do:
Switch blog index between grid, list, or collage layouts
Show or hide author names, dates, featured images
Add sections (banners, newsletter signups, featured products) to the blog landing page
Toggle comments, social sharing, and sidebar on individual posts
To change the blog post content, you should go deeper.
Level 2: Custom Templates for different content types
This level is for merchants running multiple content categories with different goals.
Shopify allows you to create and assign multiple blog templates in Online Store 2.0.
How to create one:
In the Theme Editor, go to the top dropdown → select Blogs
Click Create template → give it a name ("Buying Guide Layout", "Tutorial Layout")
Base it on the default, then customize from there

How to assign it:
Go to Content → Blog Posts → Manage blogs
Open the blog you want to update
Under Theme template, select your new template → save
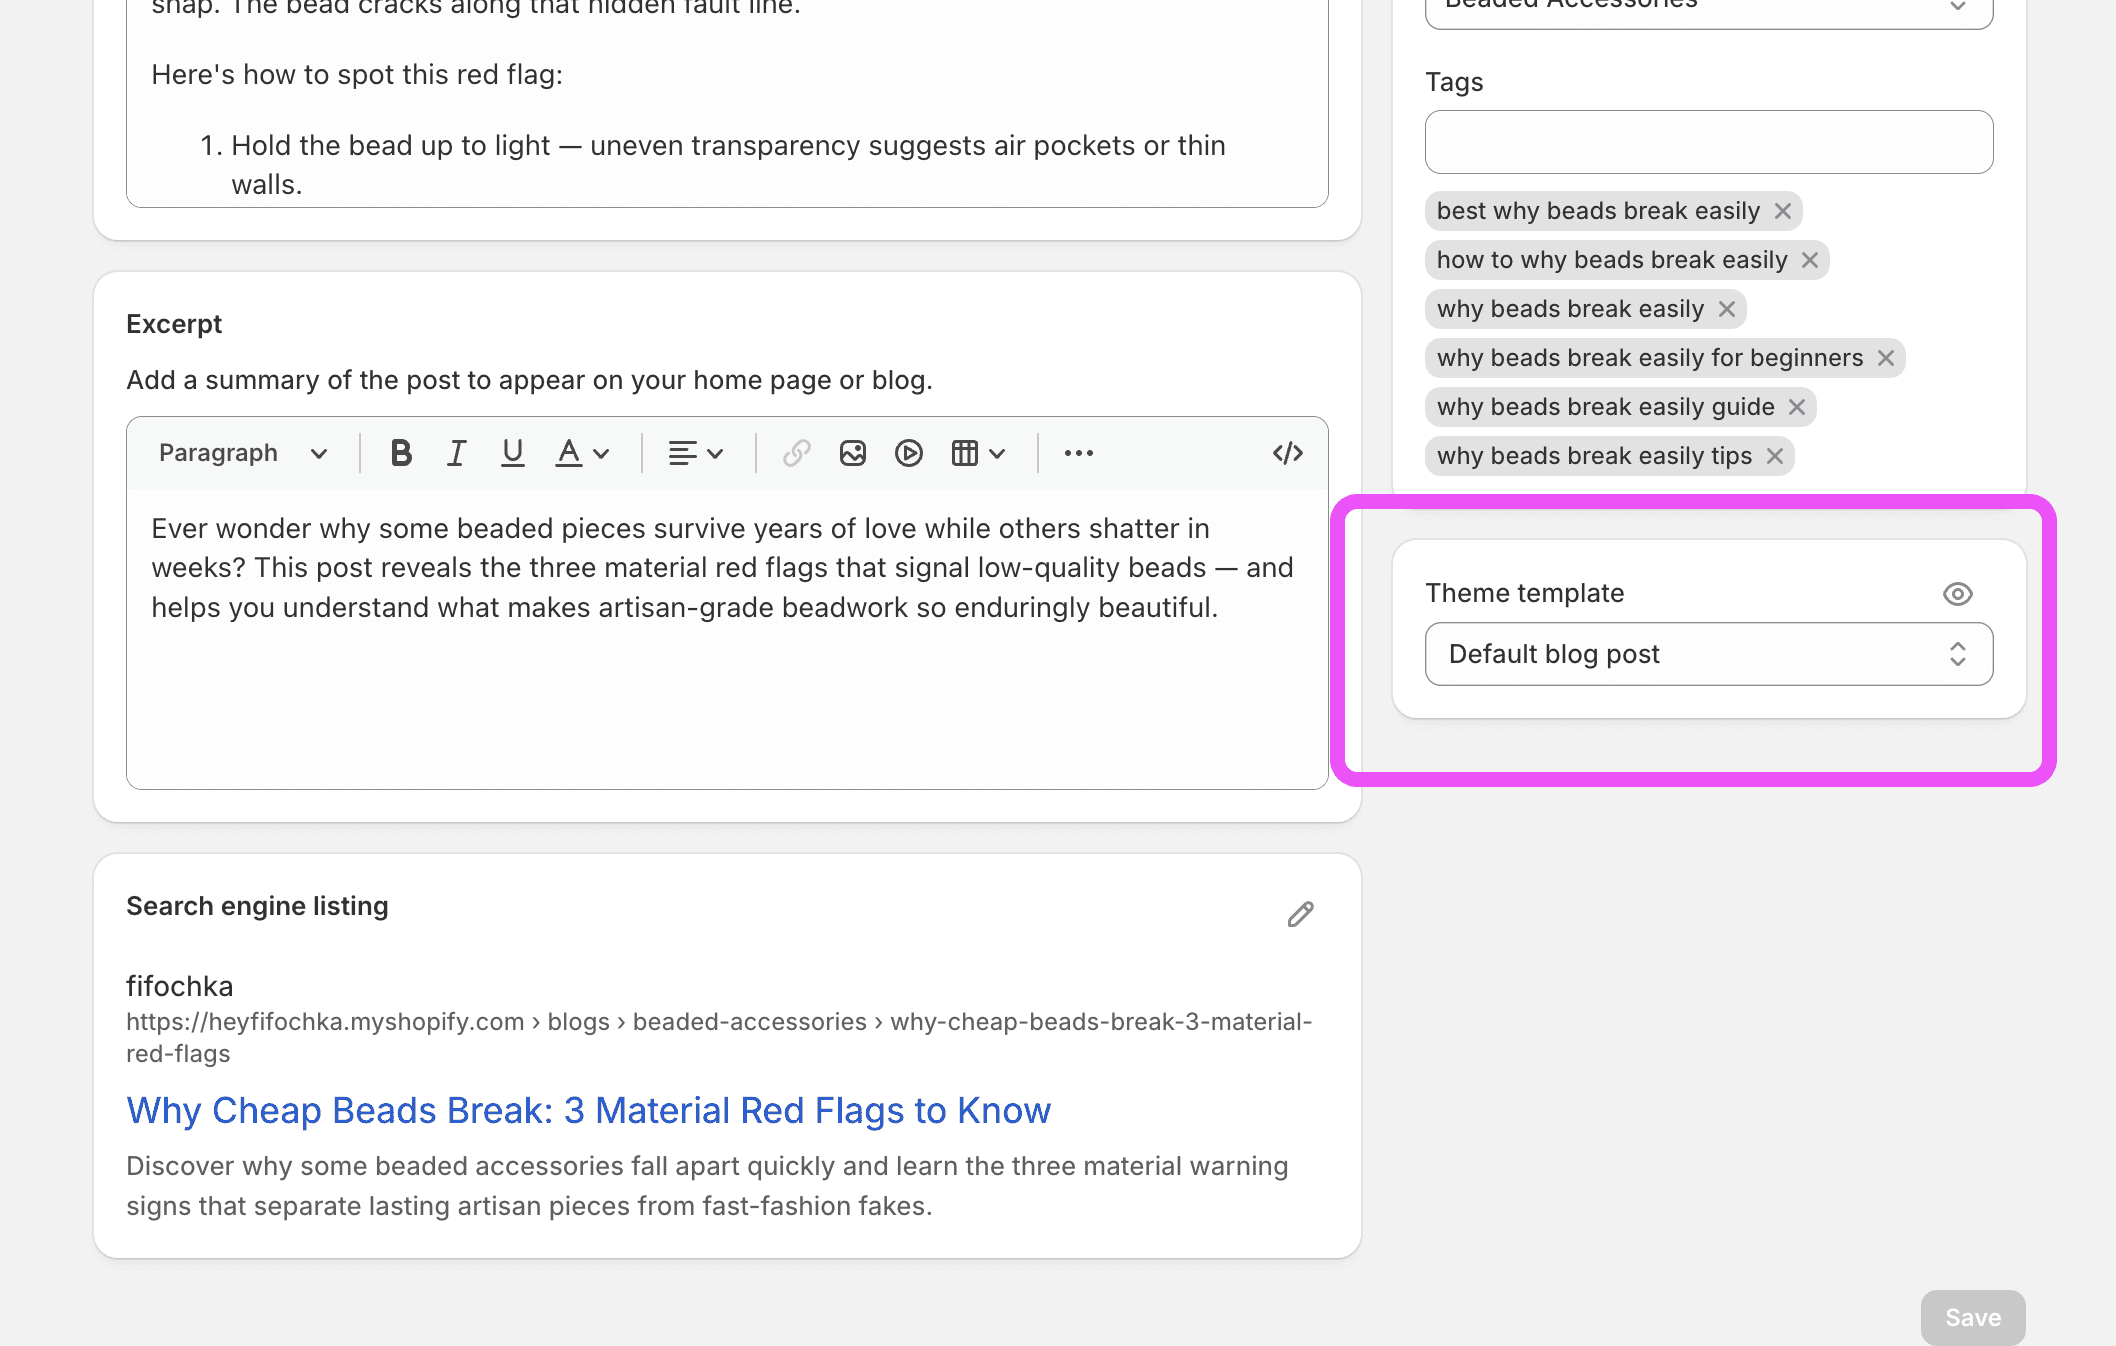
Your "Style Guides" blog can now look completely different from your "How-To" blog. Different visual weight, different CTAs, different product placement. No code needed.
Level 3: Liquid and CSS (developer access required)
Liquid and CSS customizations are best for merchants who need layout changes that Shopify's editor can't handle.
Shopify uses Liquid which is its own templating language to control how blog pages are built. The key files:
blog.liquid/blog.json— controls the index pagearticle.liquid/article.json— controls individual posts
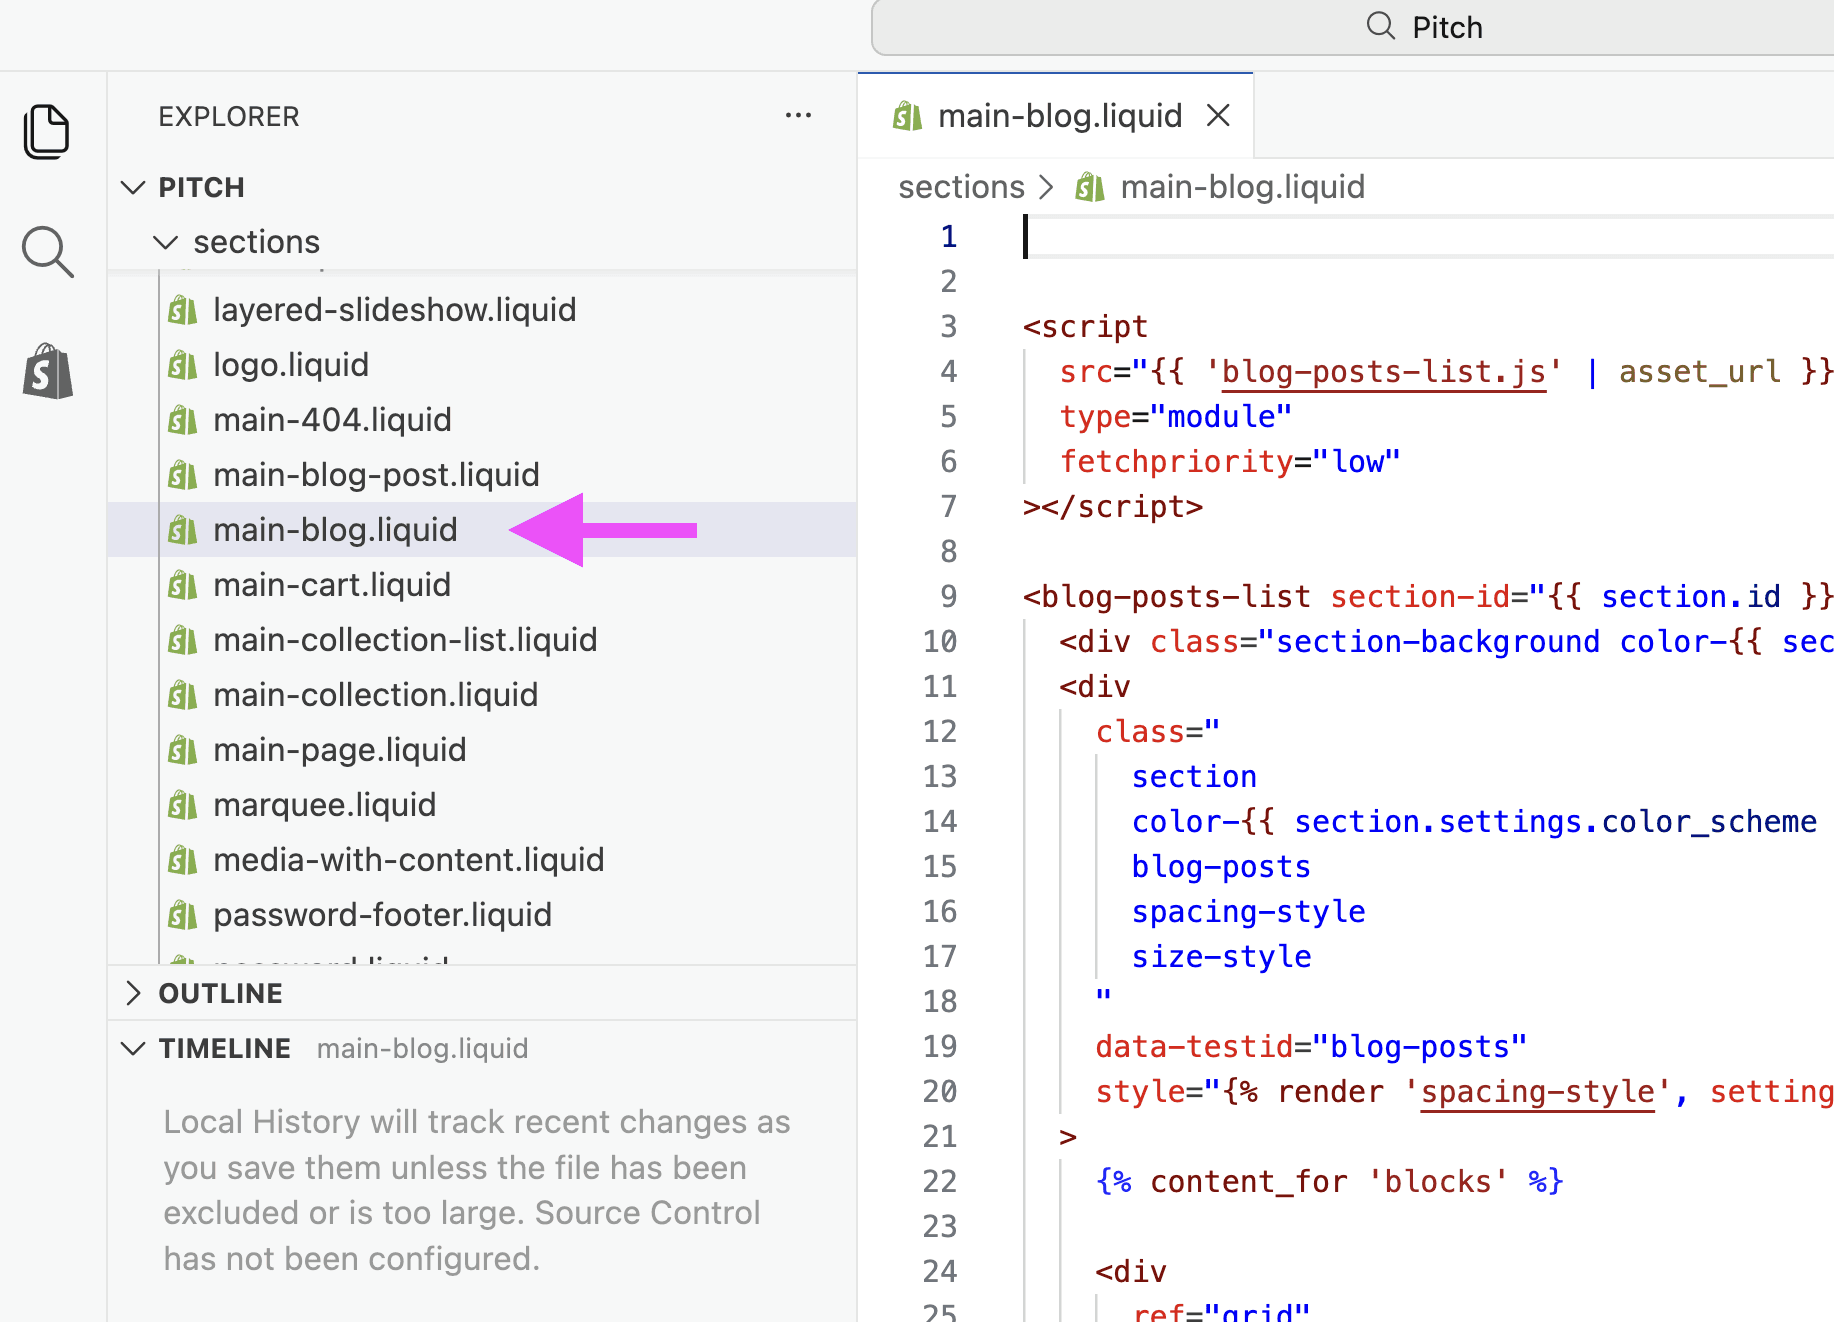
What's worth doing here:
Flexbox for better responsive layouts
Custom metafields — structured data blocks like "Product Spotlight" or "Expert Bio" that appear consistently across posts
Custom CSS for typography: line height, font weight, spacing — things that significantly affect readability
Level 4: A purpose-built blog app
Blog builder apps like vevy.ai is for merchants who want full creative control without a developer and who are serious about using content as a sales channel.
vevy.ai is built specifically for Shopify merchants who treat their blog as a revenue channel.
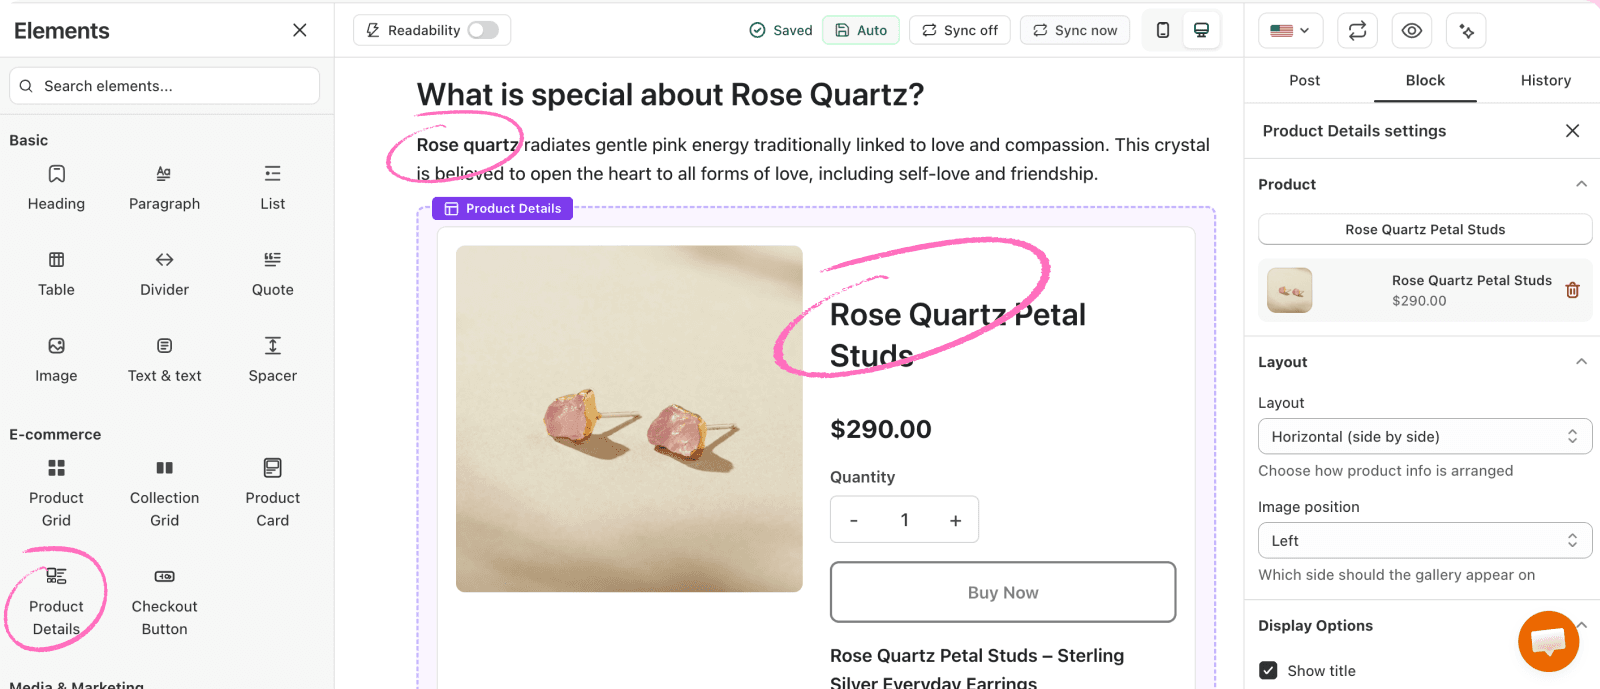
What makes vevy.ai's Blog Builder different:
30+ content elements in the Blog Builder: with the drag-and-drop blog builder, you can add e-commerce elements like product cards, collection blocks; social embeds like Instagram reels, TikTok clips, LinkedIn/Facebook posts, accordion FAQ, Recipe, custom CTAs, image galleries, banners, sliders - more!
AI Tools: in the editor, you can get help from AI tools to generate high quality blog post in different languages, cover images, inline blog images, image alt texts, meta data like meta title, description, URL slug.
Structured data: you can generate structured data for FAQ accordion and recipe (how-to guide) blocks that are added to the blog post. Once generated and added, the JSON-LD script is added to the <head> of the blog page automatically.
Content Brief: whether you're using vevy.ai's own Topical Map or you write blog post from scratch, you can generate content brief inside vevy.ai's blog editor for your blog posts. Content briefs are a detailed guide on how to write a blog post, including keywords, PAA questions pulled from Google SERP, FAQ questions, funnel stages, blog type ad intent, content angel, etc.
How to customize Shopify blog (for free)?
Here's a free and step by step guide on how to fully customize the your blog posts in Shopify:
1. Install vevy.ai from the Shopify App Store
Install the vevy AI Blog Post Writer Agent app from the Shopify App Store.
2. Scan your store
After authentication, click "Scan My Store." vevy.ai analyzes what you sell and your existing pages, then generates a topical map with clustered topics and recommended blog posts.

3. Choose your starting point
Select one of three options:
Click "Create Blog Post" to write from scratch
Click "Sync Shopify Posts" to edit your existing blog posts
Select a generated post from your topical map
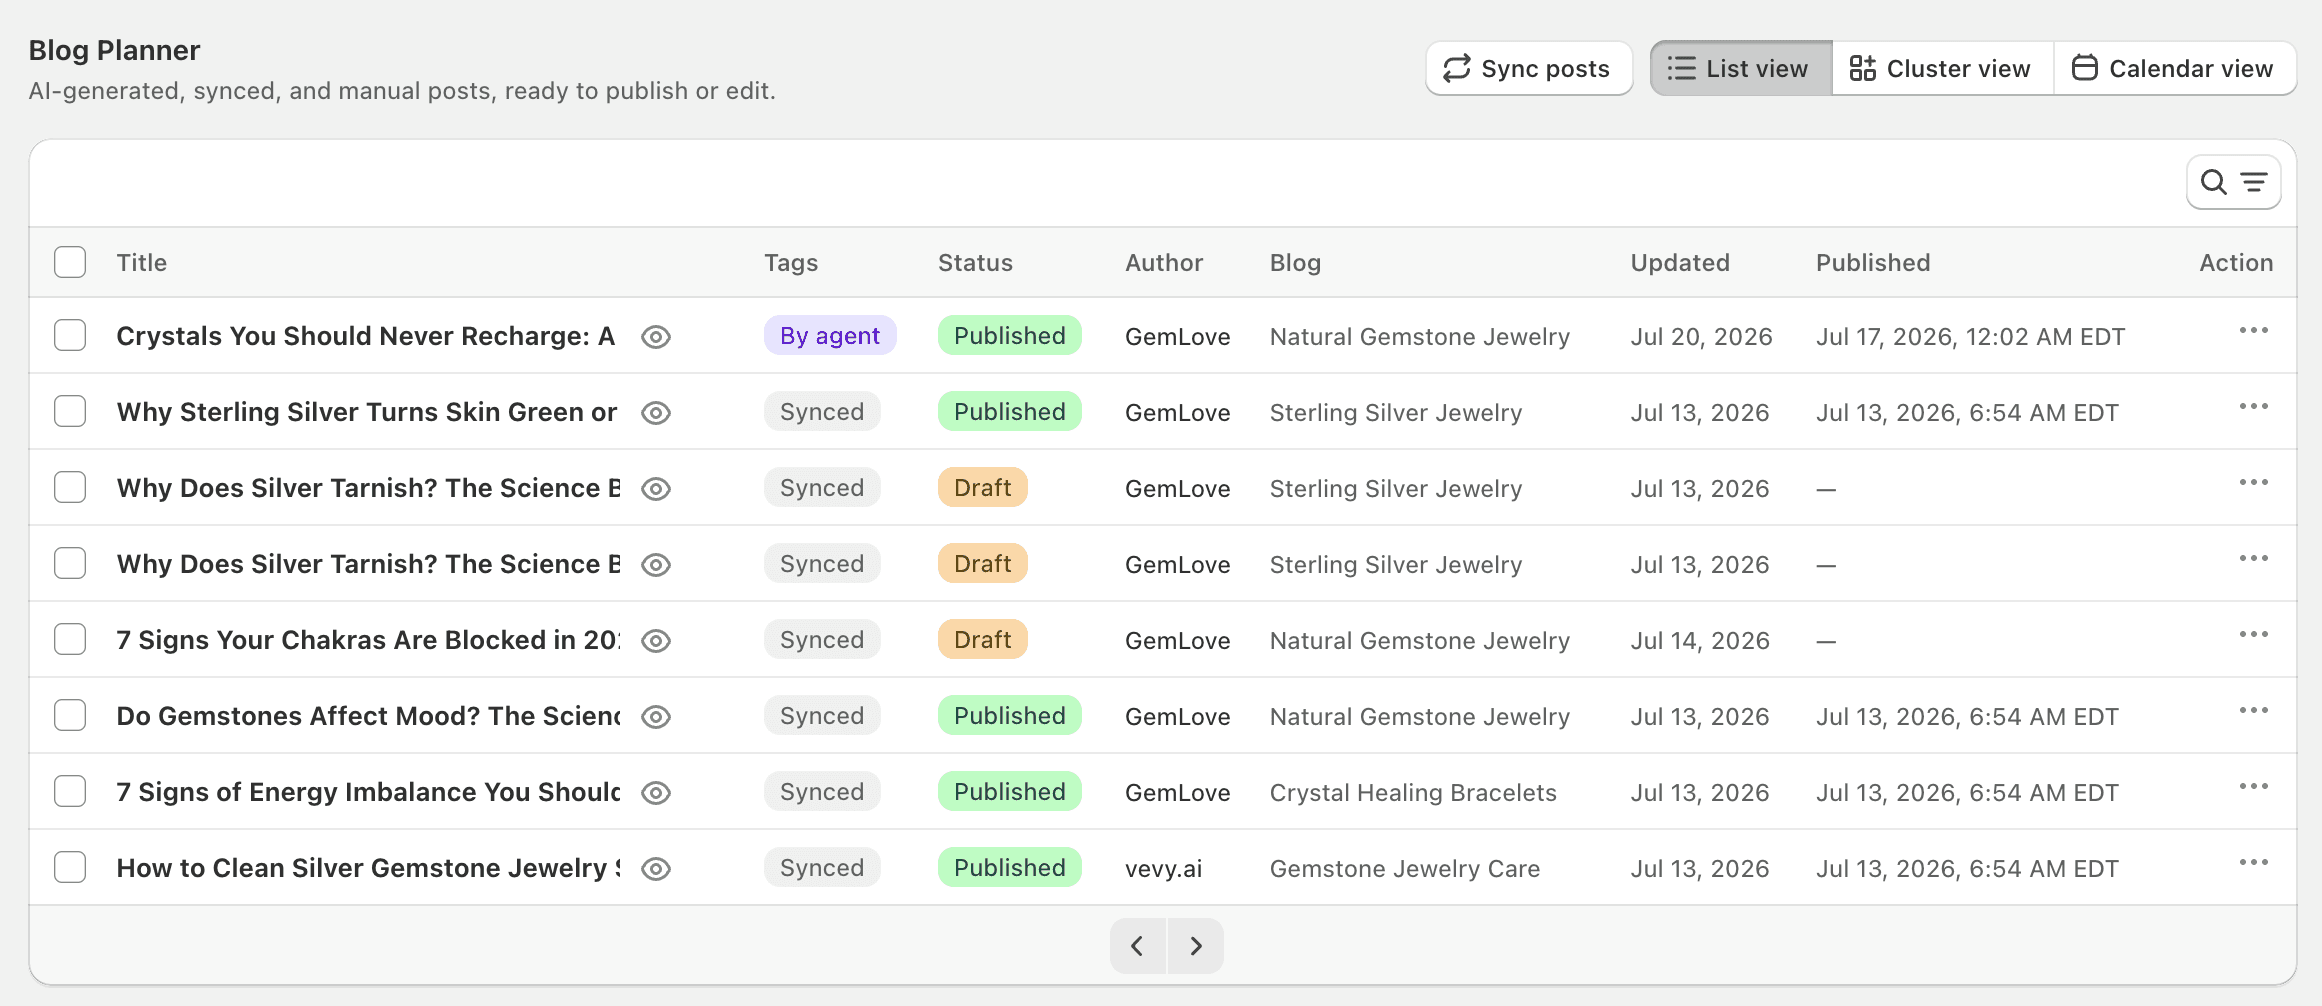
4. Open the editor
Click a blog post (whether it's synced, added by you or from the topical map). Here you can drag any element into your blog post.
Blog post elements include:
Basic elements
e-Commerce elements
Media & Marketing elements
Social Embeds
Layout elements
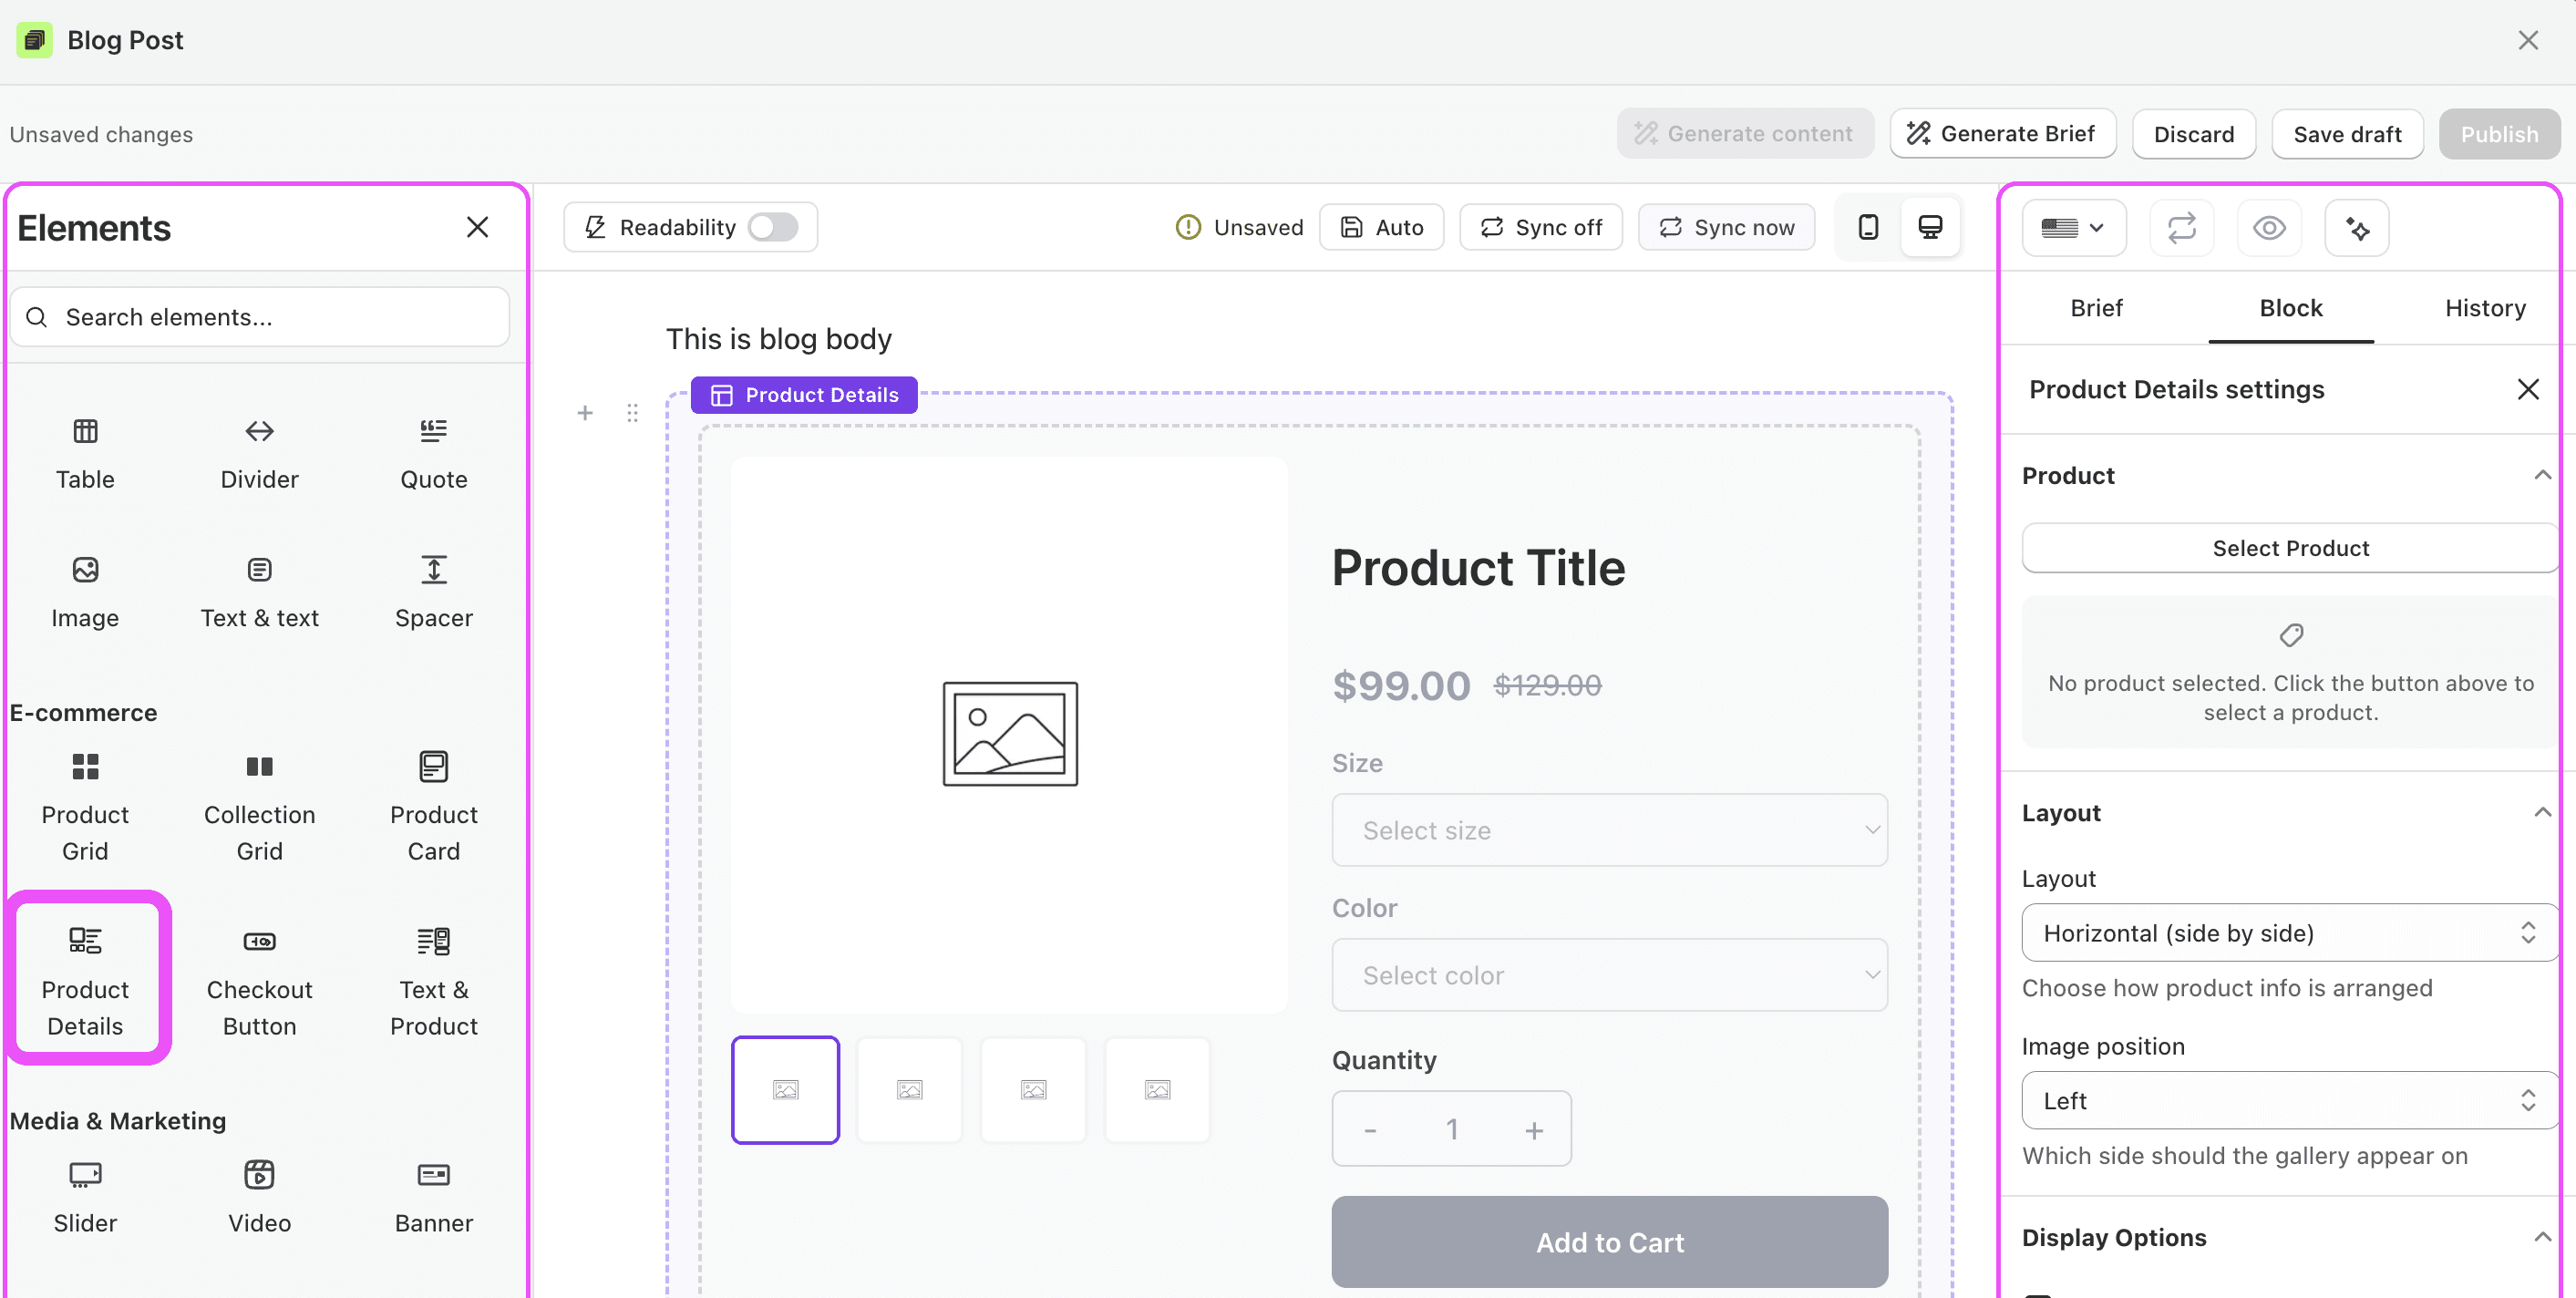
5. Customize Individual Blocks
Click any block you've added. On the right side of the editor, you'll see the settings and customization options for the added block.
Here, you can fully and fully customize the block typography, colors, margins, padding, and layout - anything.
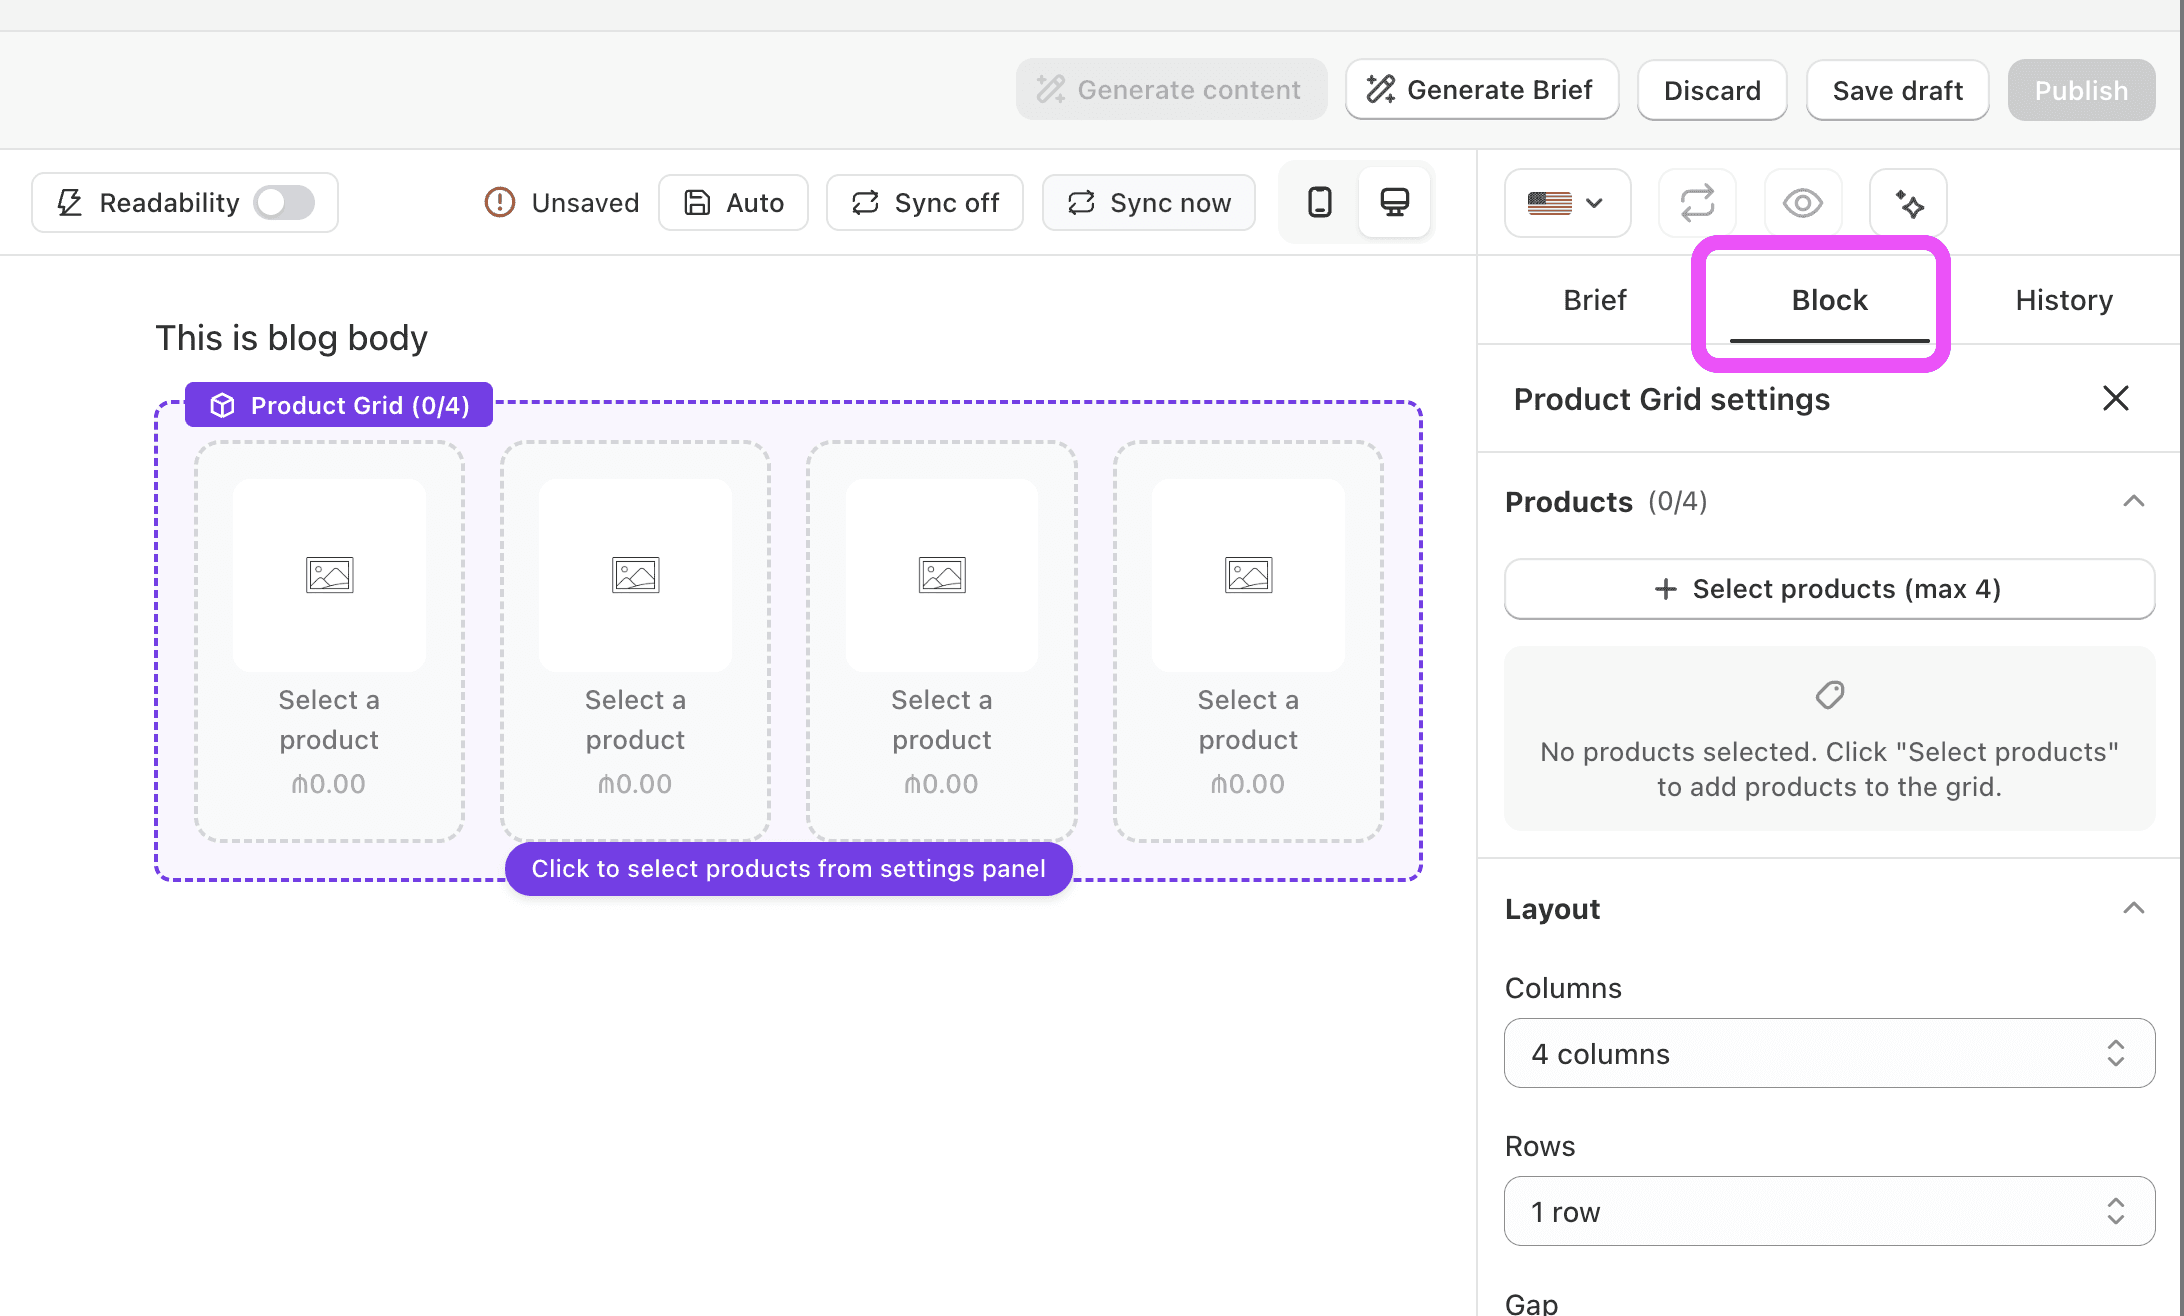
Click publish or eye icon to view and preview the blog post.
Here are the most recommended blog post elements you can add to the blog post:
Product details card: Showcase relevant products that complement your blog post topic
Collection grid: Display related collections that tie into your content
Social media embeds: Add Instagram reels or TikTok clips to boost engagement
Image slider: Feature appealing visuals with navigation buttons
FAQ section: Answer common questions your readers might have
Map embed: Show your service area if you operate locally or provide regional services