




How To's
/
How to embed maps to a blog post in Shopify?
How to embed maps to a blog post in Shopify?
How to embed a Google Map in a blog post in Shopify with step-by-step guide
3 min read
vevy.ai lets you embed a map into your Shopify blog posts as one of the layout elements. Paste a Google Maps embed code, drop in a Maps URL, or simply type an address — the block handles all three.
This works for posts made in Shopify's own blog editor too. For this, you just need to sync the post first on the vevy.ai's dashboard.
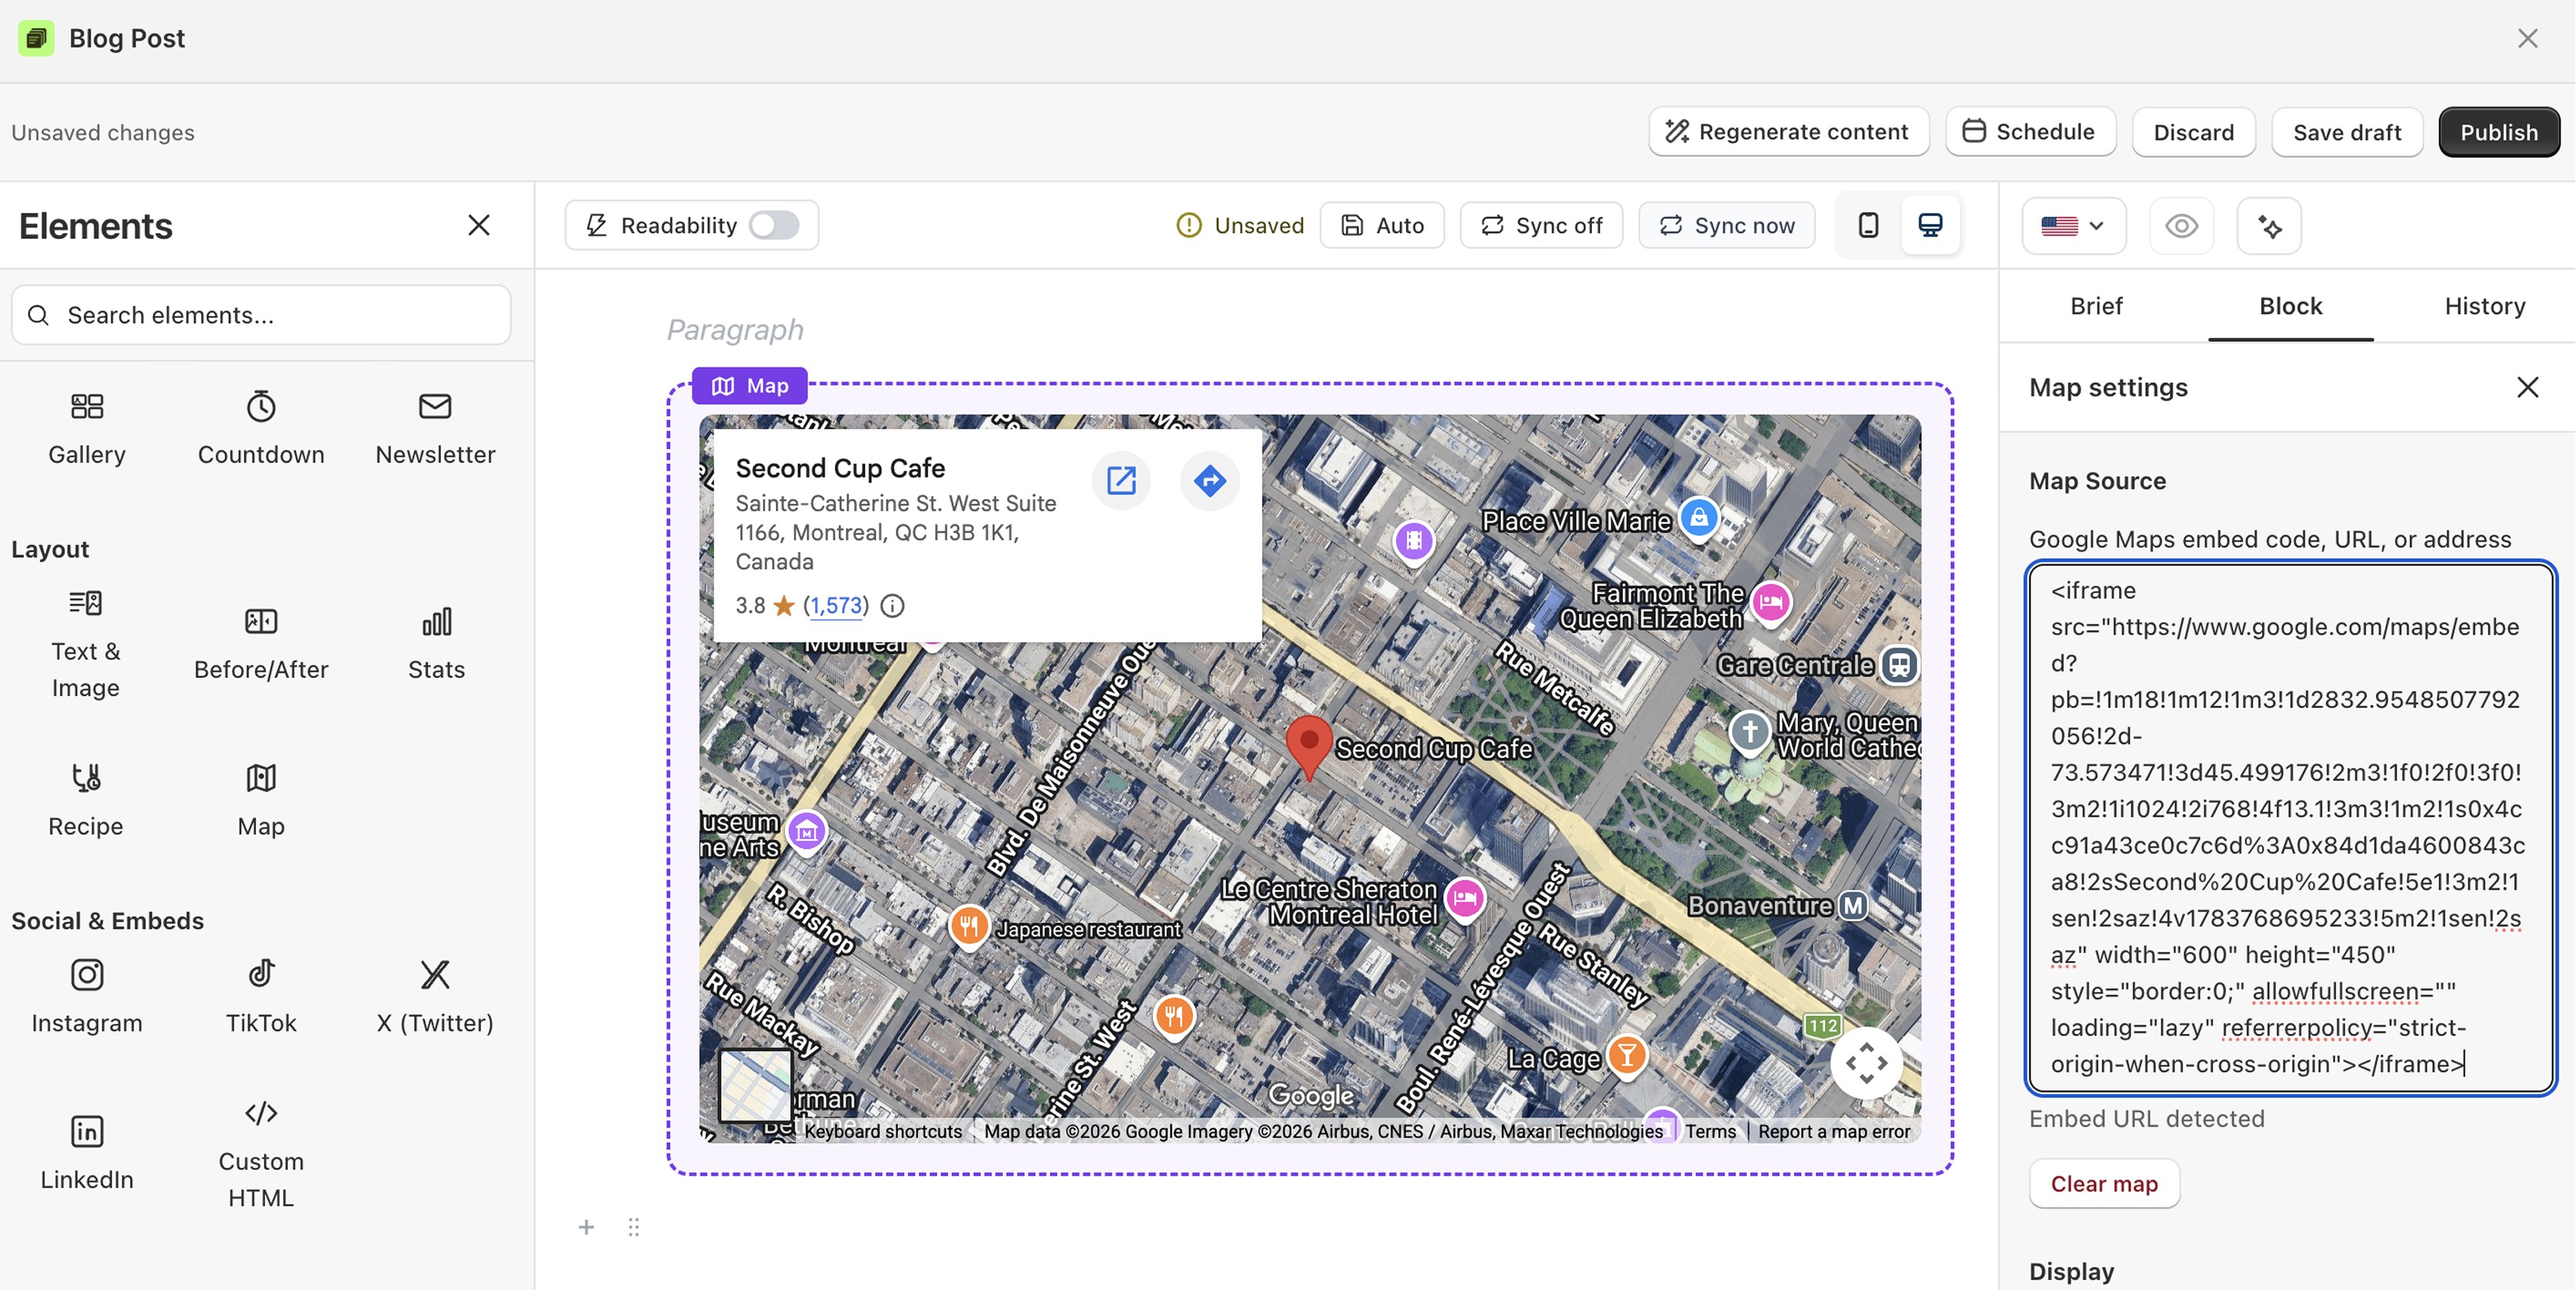
Syncing blog posts add them to the vevy.ai's dashboard, so you can add maps and other blocks with the Blog Builder, even if the post wasn't created in vevy.ai.
How to embed a map in a blog post in Shopify?
Open your blog post in vevy.ai's Blog Builder.
In the Elements panel on the left, open Layout and pick Map.
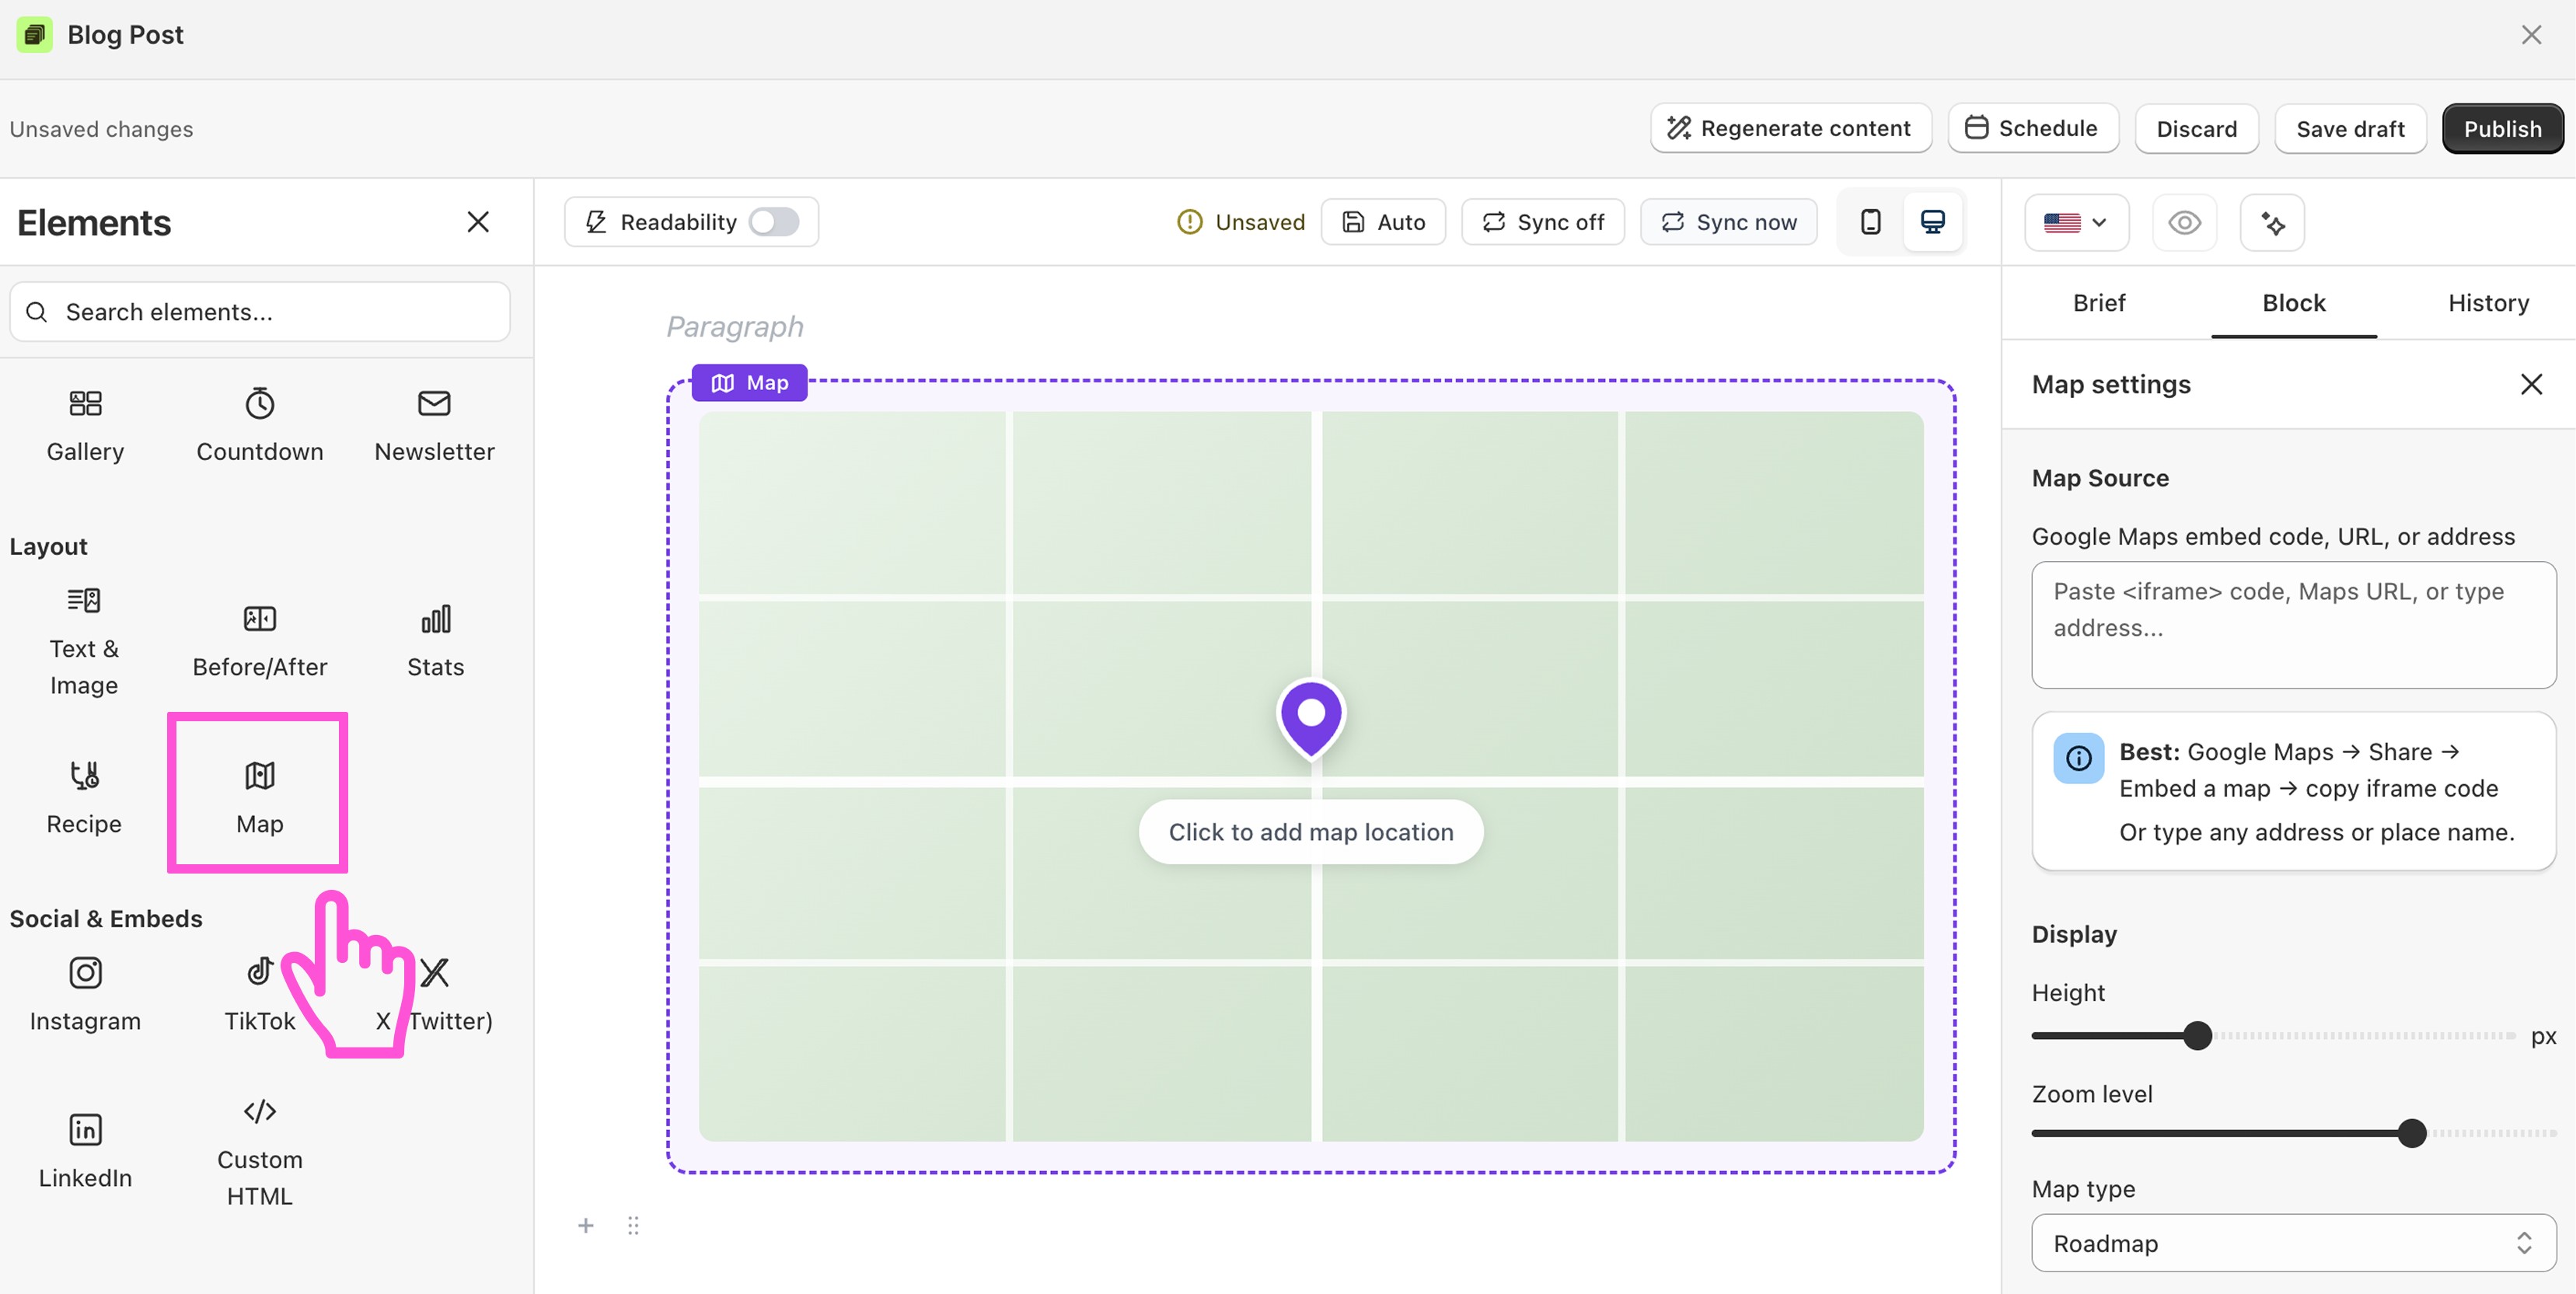
Drag the block into your post, right where you want it.
Click the block to open Map settings in the Block tab on the right.
In Map Source, paste one of the following: a Google Maps
<iframe>embed code, a Maps URL, or a plain address or place name.
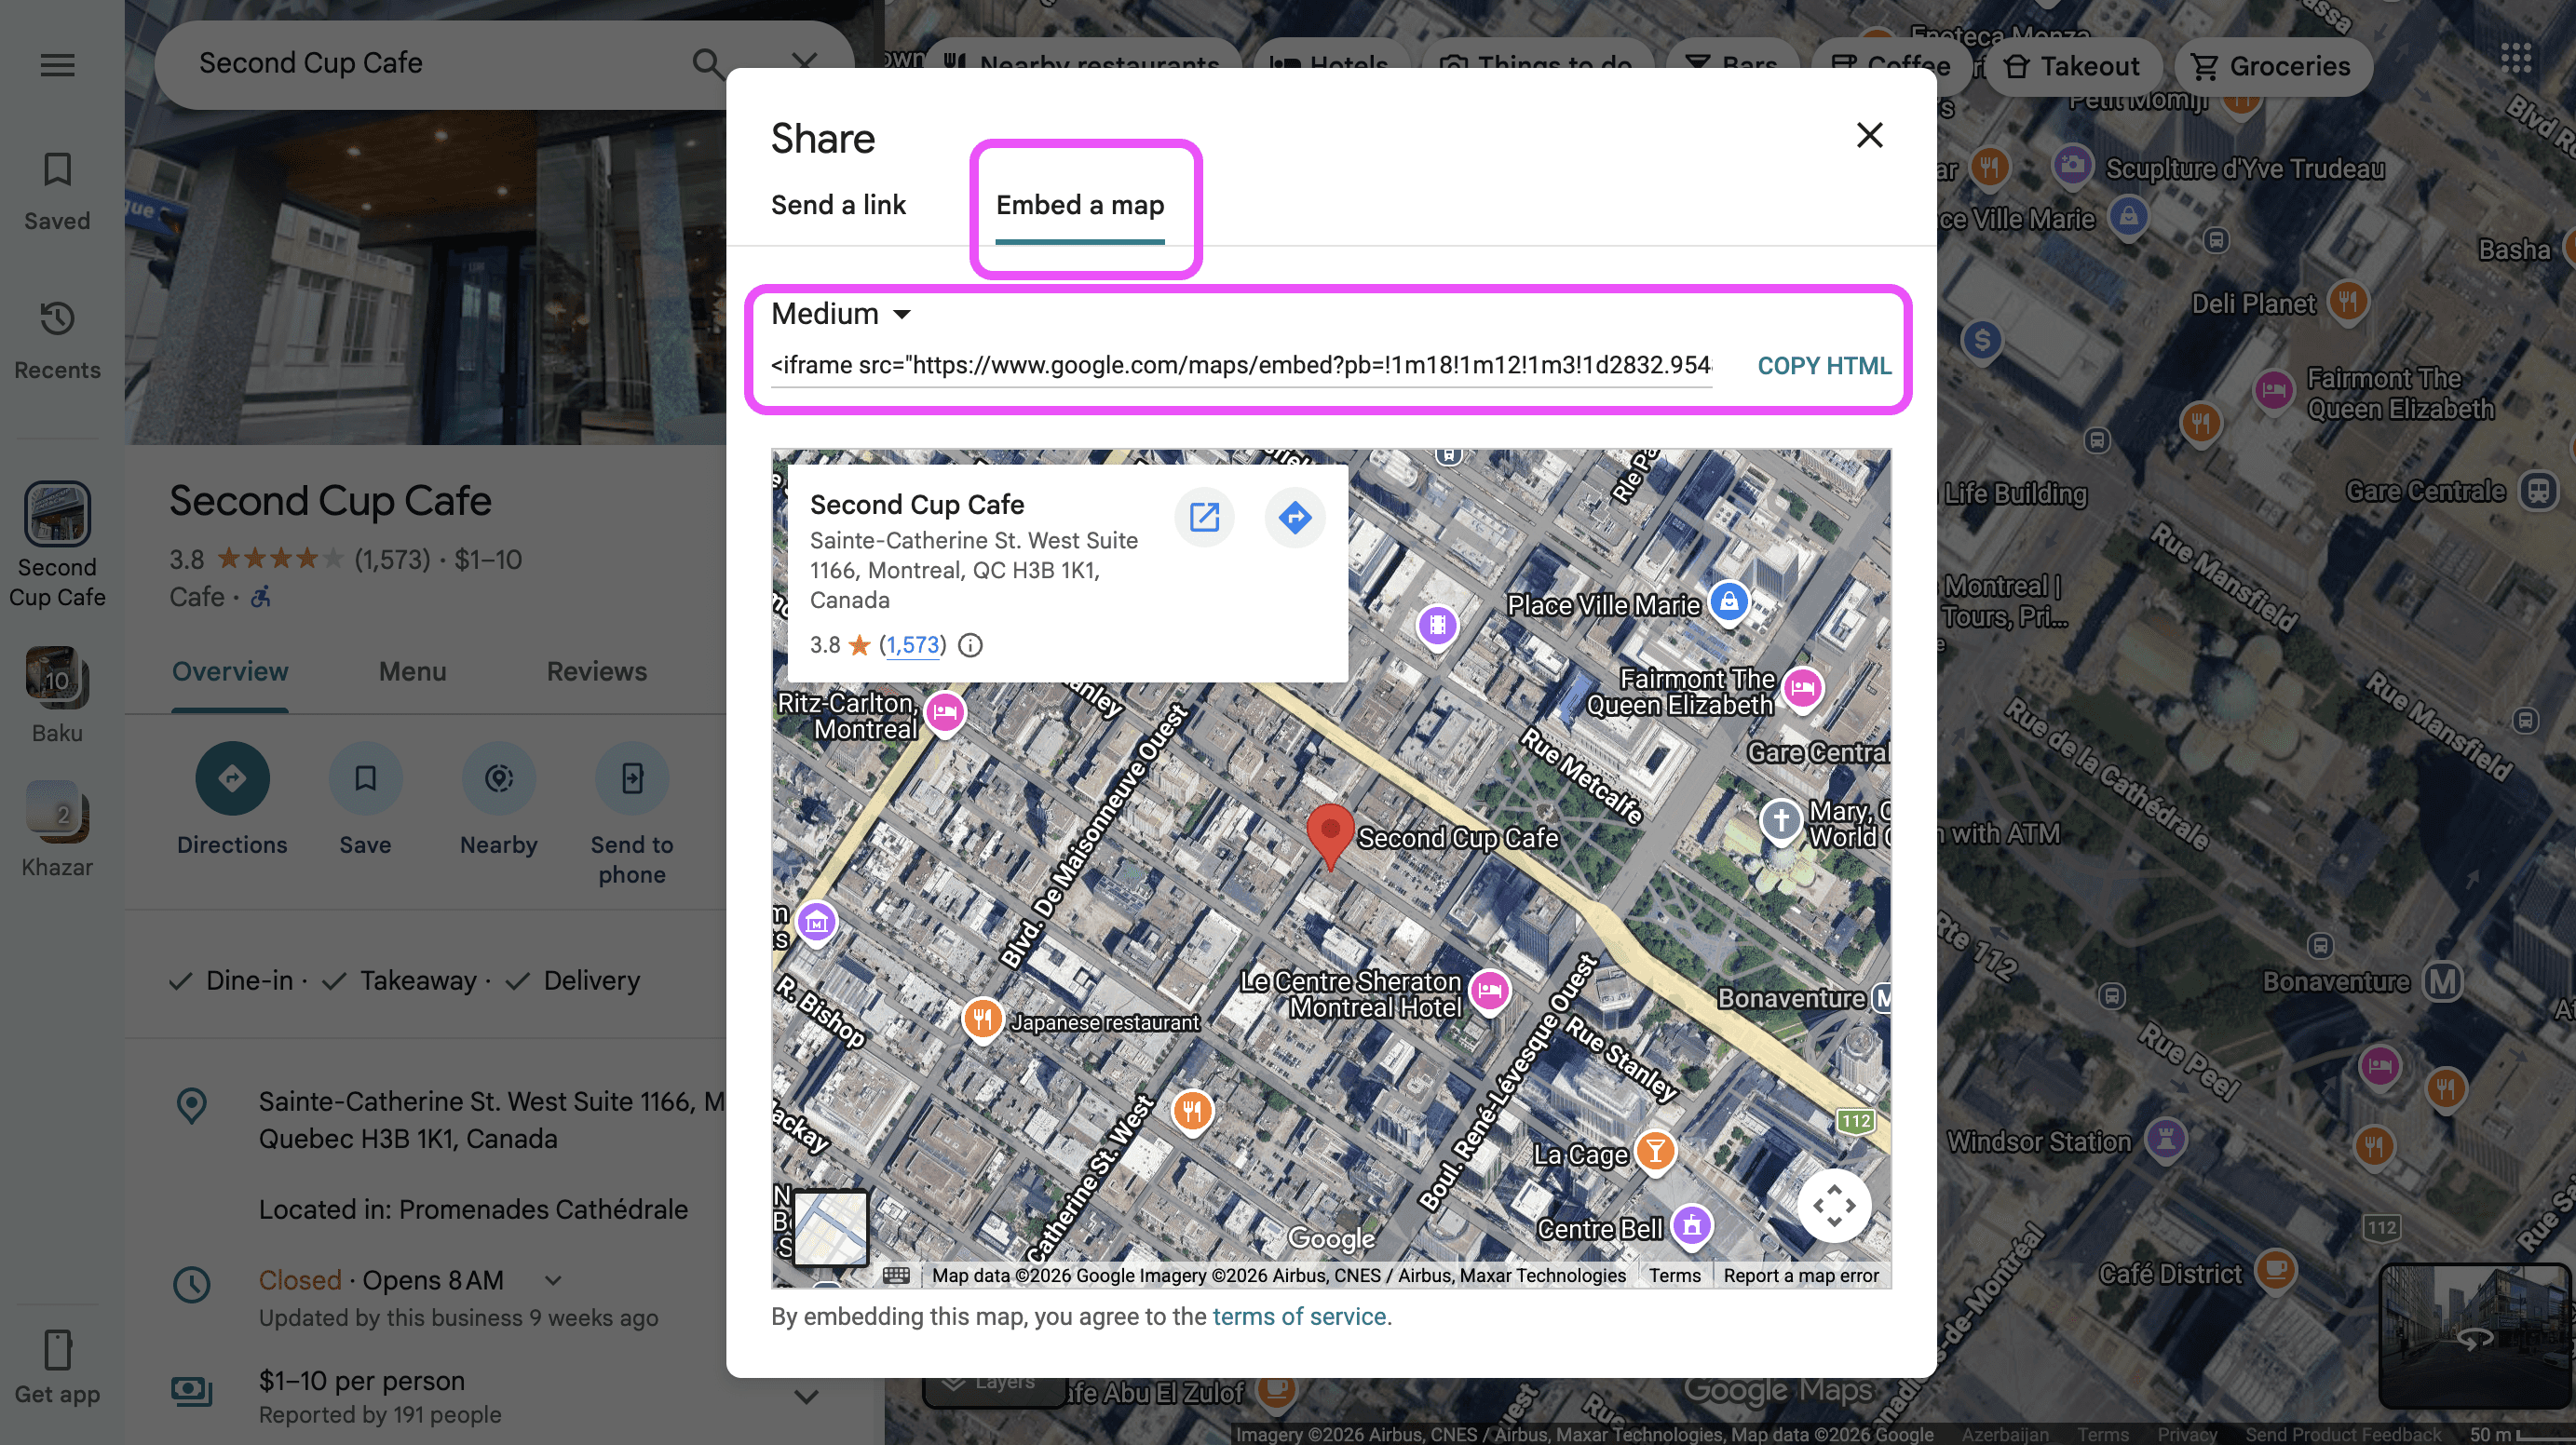
The most reliable option: in Google Maps, open Share → Embed a map, copy the iframe code, and paste it here.
Under Display, set the Height, Zoom level, and Map type.
Click Save draft or Publish.
What you can customize
Map source — iframe embed code, Maps URL, or a typed address or place name
Height — how tall the map sits in the post
Zoom level — from a wide regional view down to the street
Map type — roadmap and other views