




How To's
/
How to add a customer testimonial to a blog post in Shopify?
How to add a customer testimonial to a blog post in Shopify?
How to add a customer testimonial to a blog post in Shopify with step-by-step guide
3 min read
vevy.ai lets you add a testimonial — a customer quote with a name, title, photo, and star rating — to your Shopify blog posts as one of the media & marketing elements. Your own claims persuade; your customers' claims convert.
This works for posts made in Shopify's own blog editor too. For this, you just need to sync the post first on the vevy.ai's dashboard.
Syncing blog posts add them to the vevy.ai's dashboard, so you can add testimonials and other blocks with the Blog Builder, even if the post wasn't created in vevy.ai.
How to add a testimonial to a blog post in Shopify?
Open your blog post in vevy.ai's Blog Builder.
In the Elements panel on the left, open Media & Marketing and pick Testimonial.
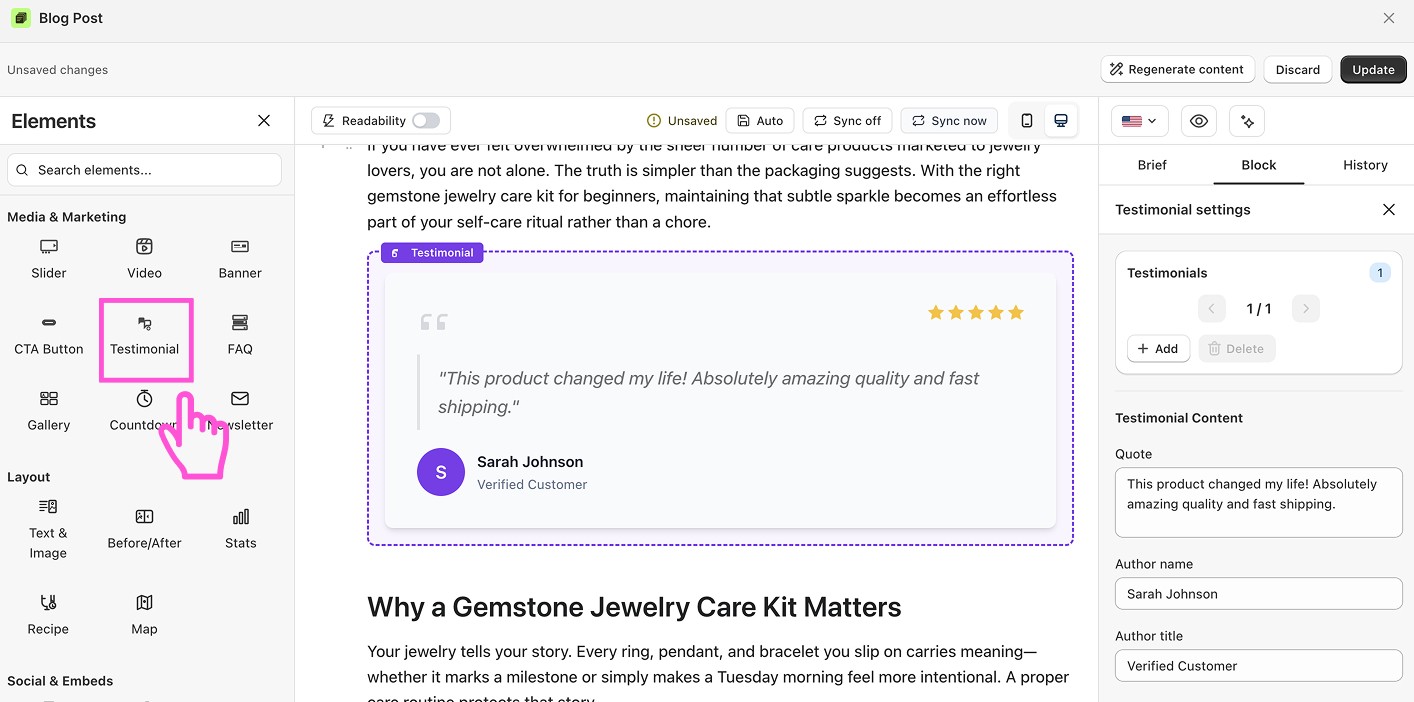
Drag the block into your post, right where you want it.
Click the block to open Testimonial settings in the Block tab on the right.
Under Testimonial Content, paste the Quote, then fill in the Author name and Author title (for example, Verified Customer).
Upload an Author image or pick one from your Library. If you skip it, the block shows the author's initial instead.
Set the Rating by clicking the stars.
To add more than one testimonial, click Add — use the arrows to move between them and Delete to remove one.
Click Save draft or Publish.
What you can customize
Quote, author name, and author title — the words and who said them
Author image — upload a photo or pull one from your library (JPG, PNG, GIF, WebP, SVG)
Rating — set the star count, or hide the stars entirely with Show star rating
Layout — card and other display styles
Colors — background color and accent color to match your brand
Multiple testimonials — hold several in one block and page between them