




How To's
/
How to add a checkout button to a blog post in Shopify?
How to add a checkout button to a blog post in Shopify?
Learn how to add a direct product checkout button with no code to a blog post in Shopify with step-by-step guide.
3 min read
You can add checkout button to your Shopify blog posts for one or more than one products.
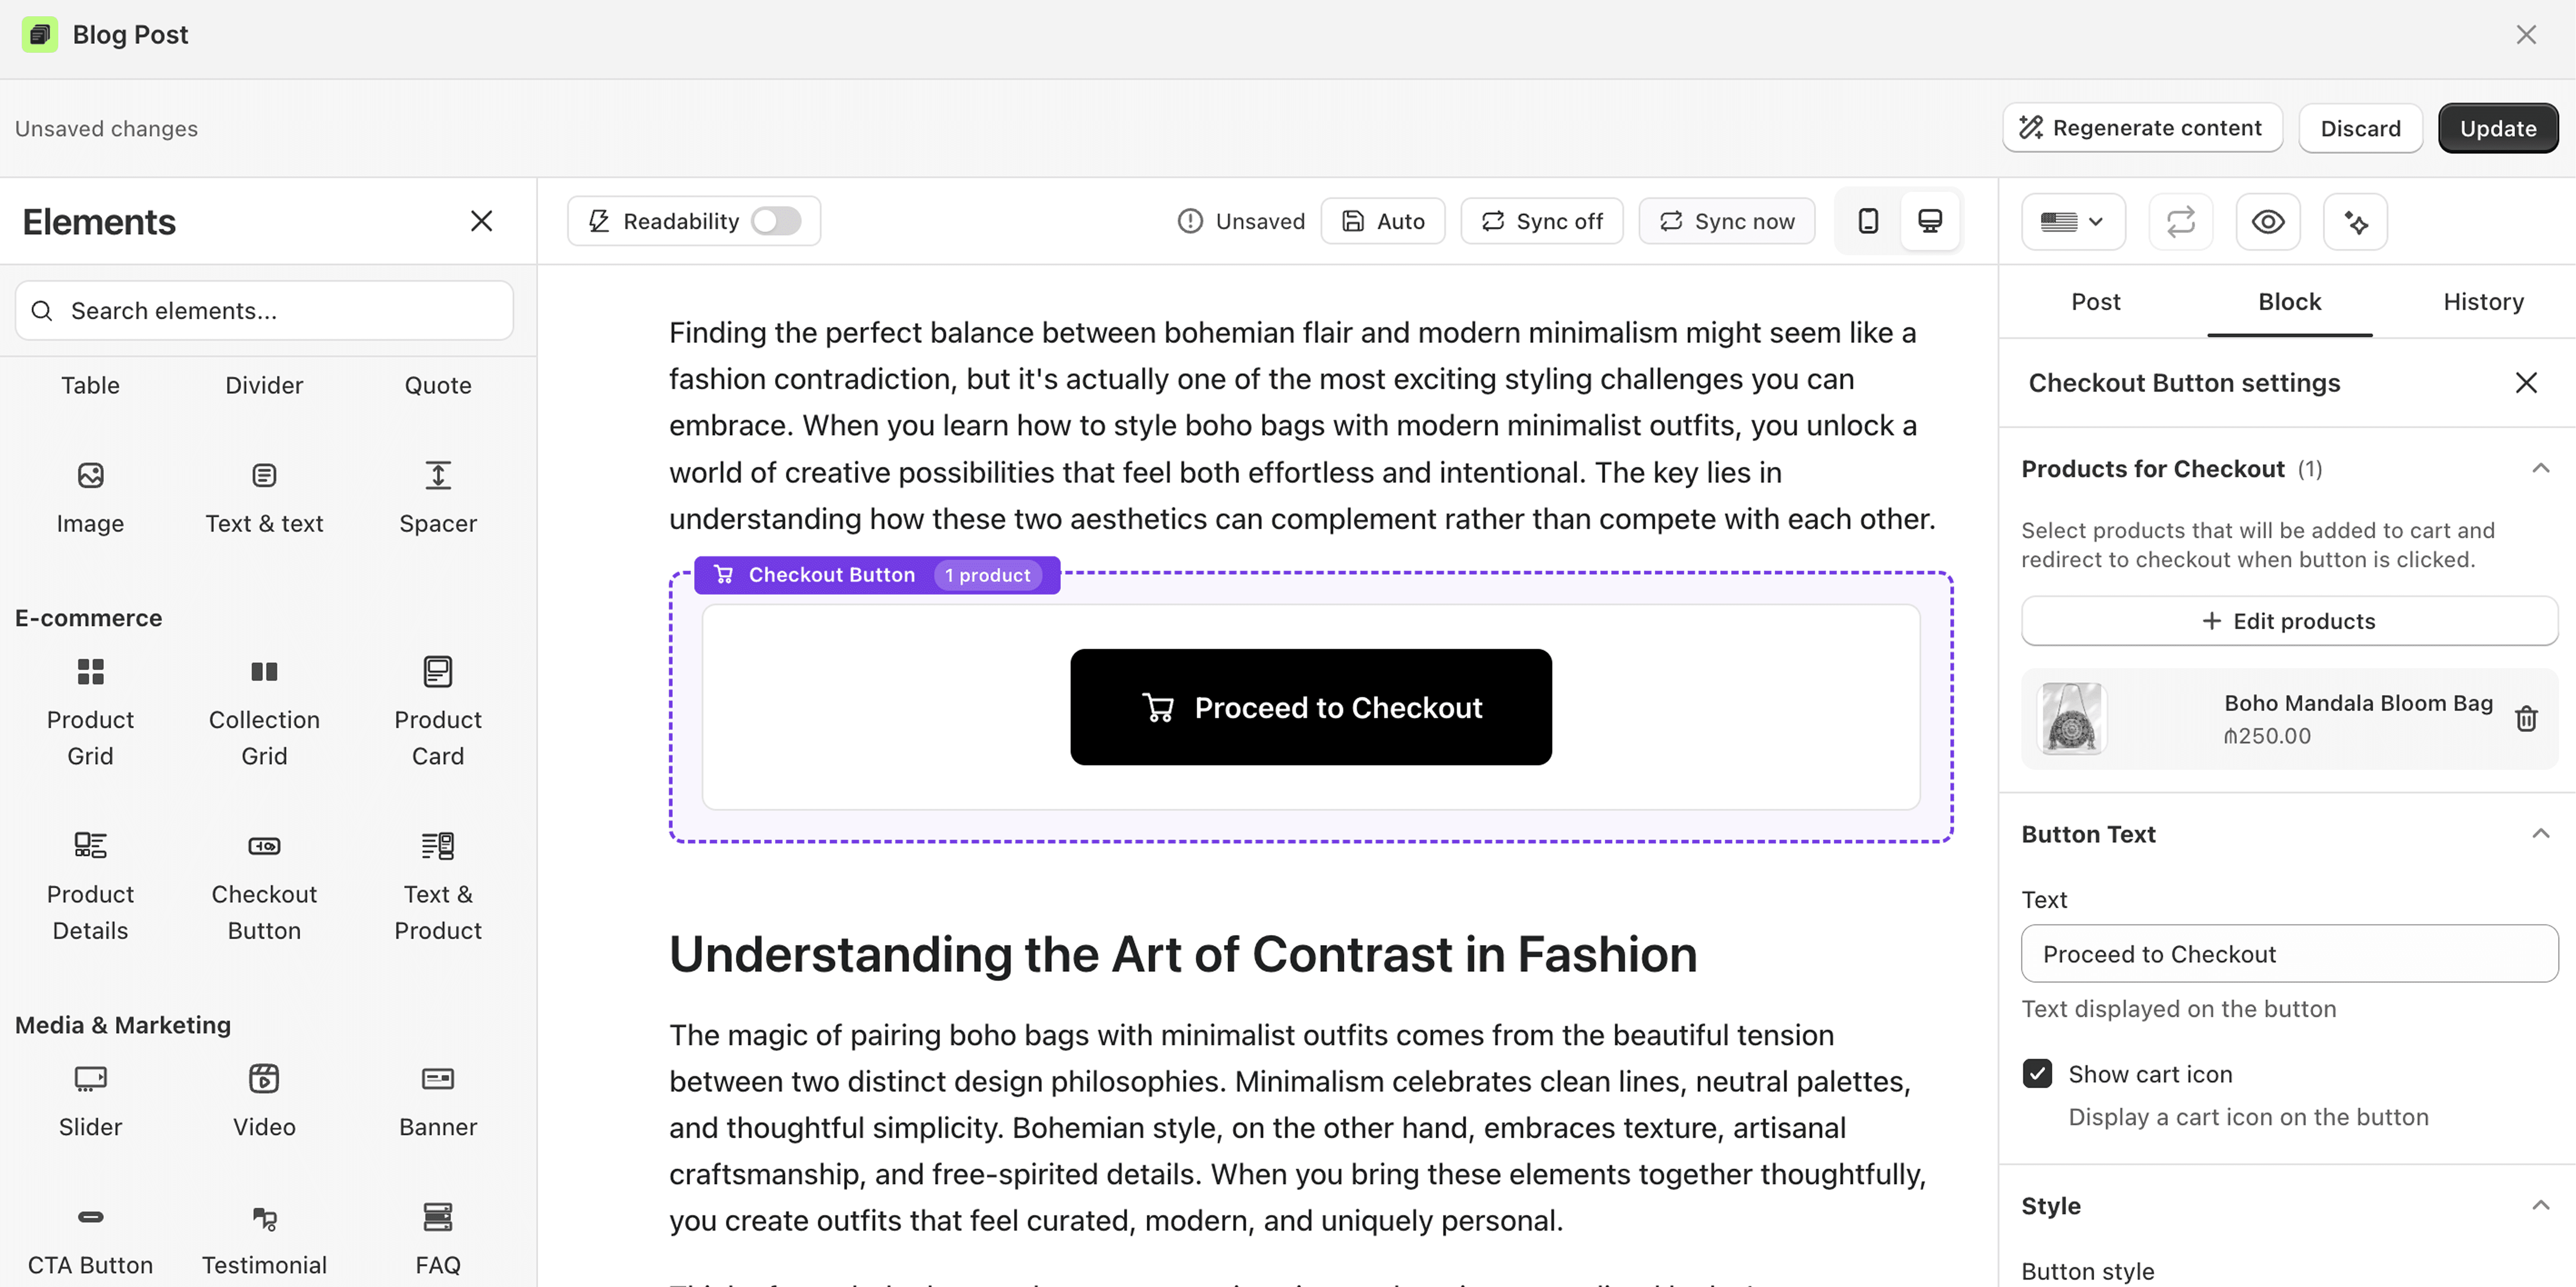
To add the checkout buttons to the posts made in Shopify's own blog editor, you just need to sync the post first on the vevy.ai's dashboard:

How to add a checkout button to a Shopify blog post
Open your post in the Blog Builder.
In the Elements panel, open E-commerce and find Checkout Button.
Drag the button into your post.
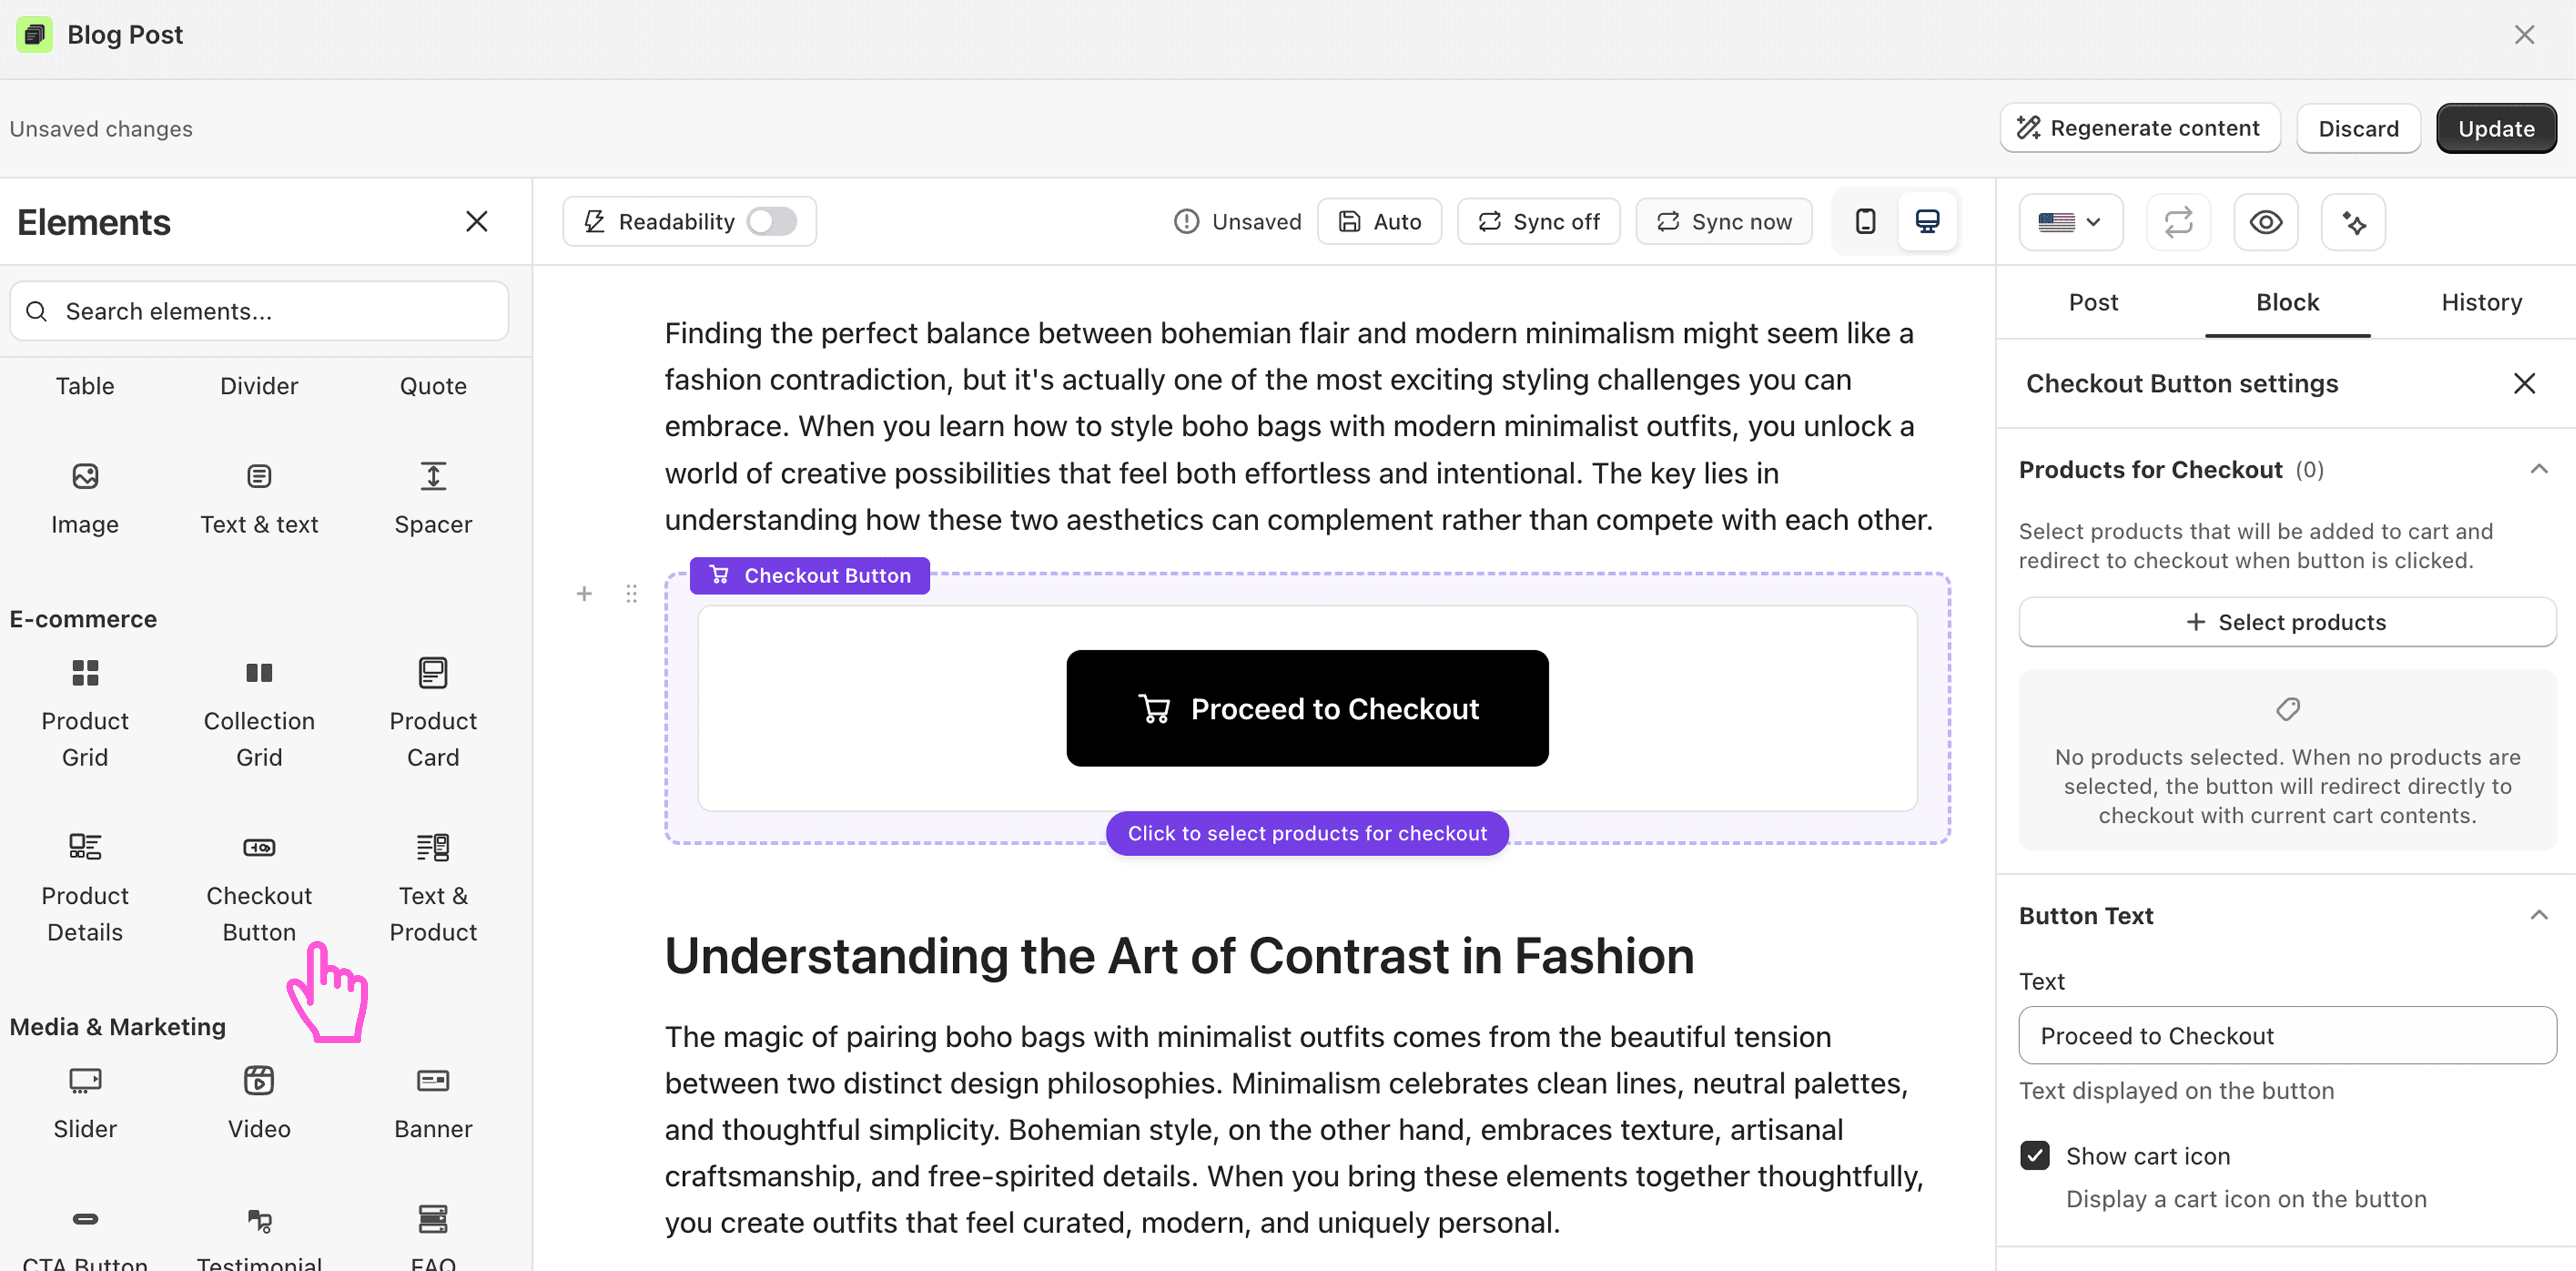
Click it to open its settings on the right.
Click Select products to choose what gets added to the cart. You can add one or multiple products.
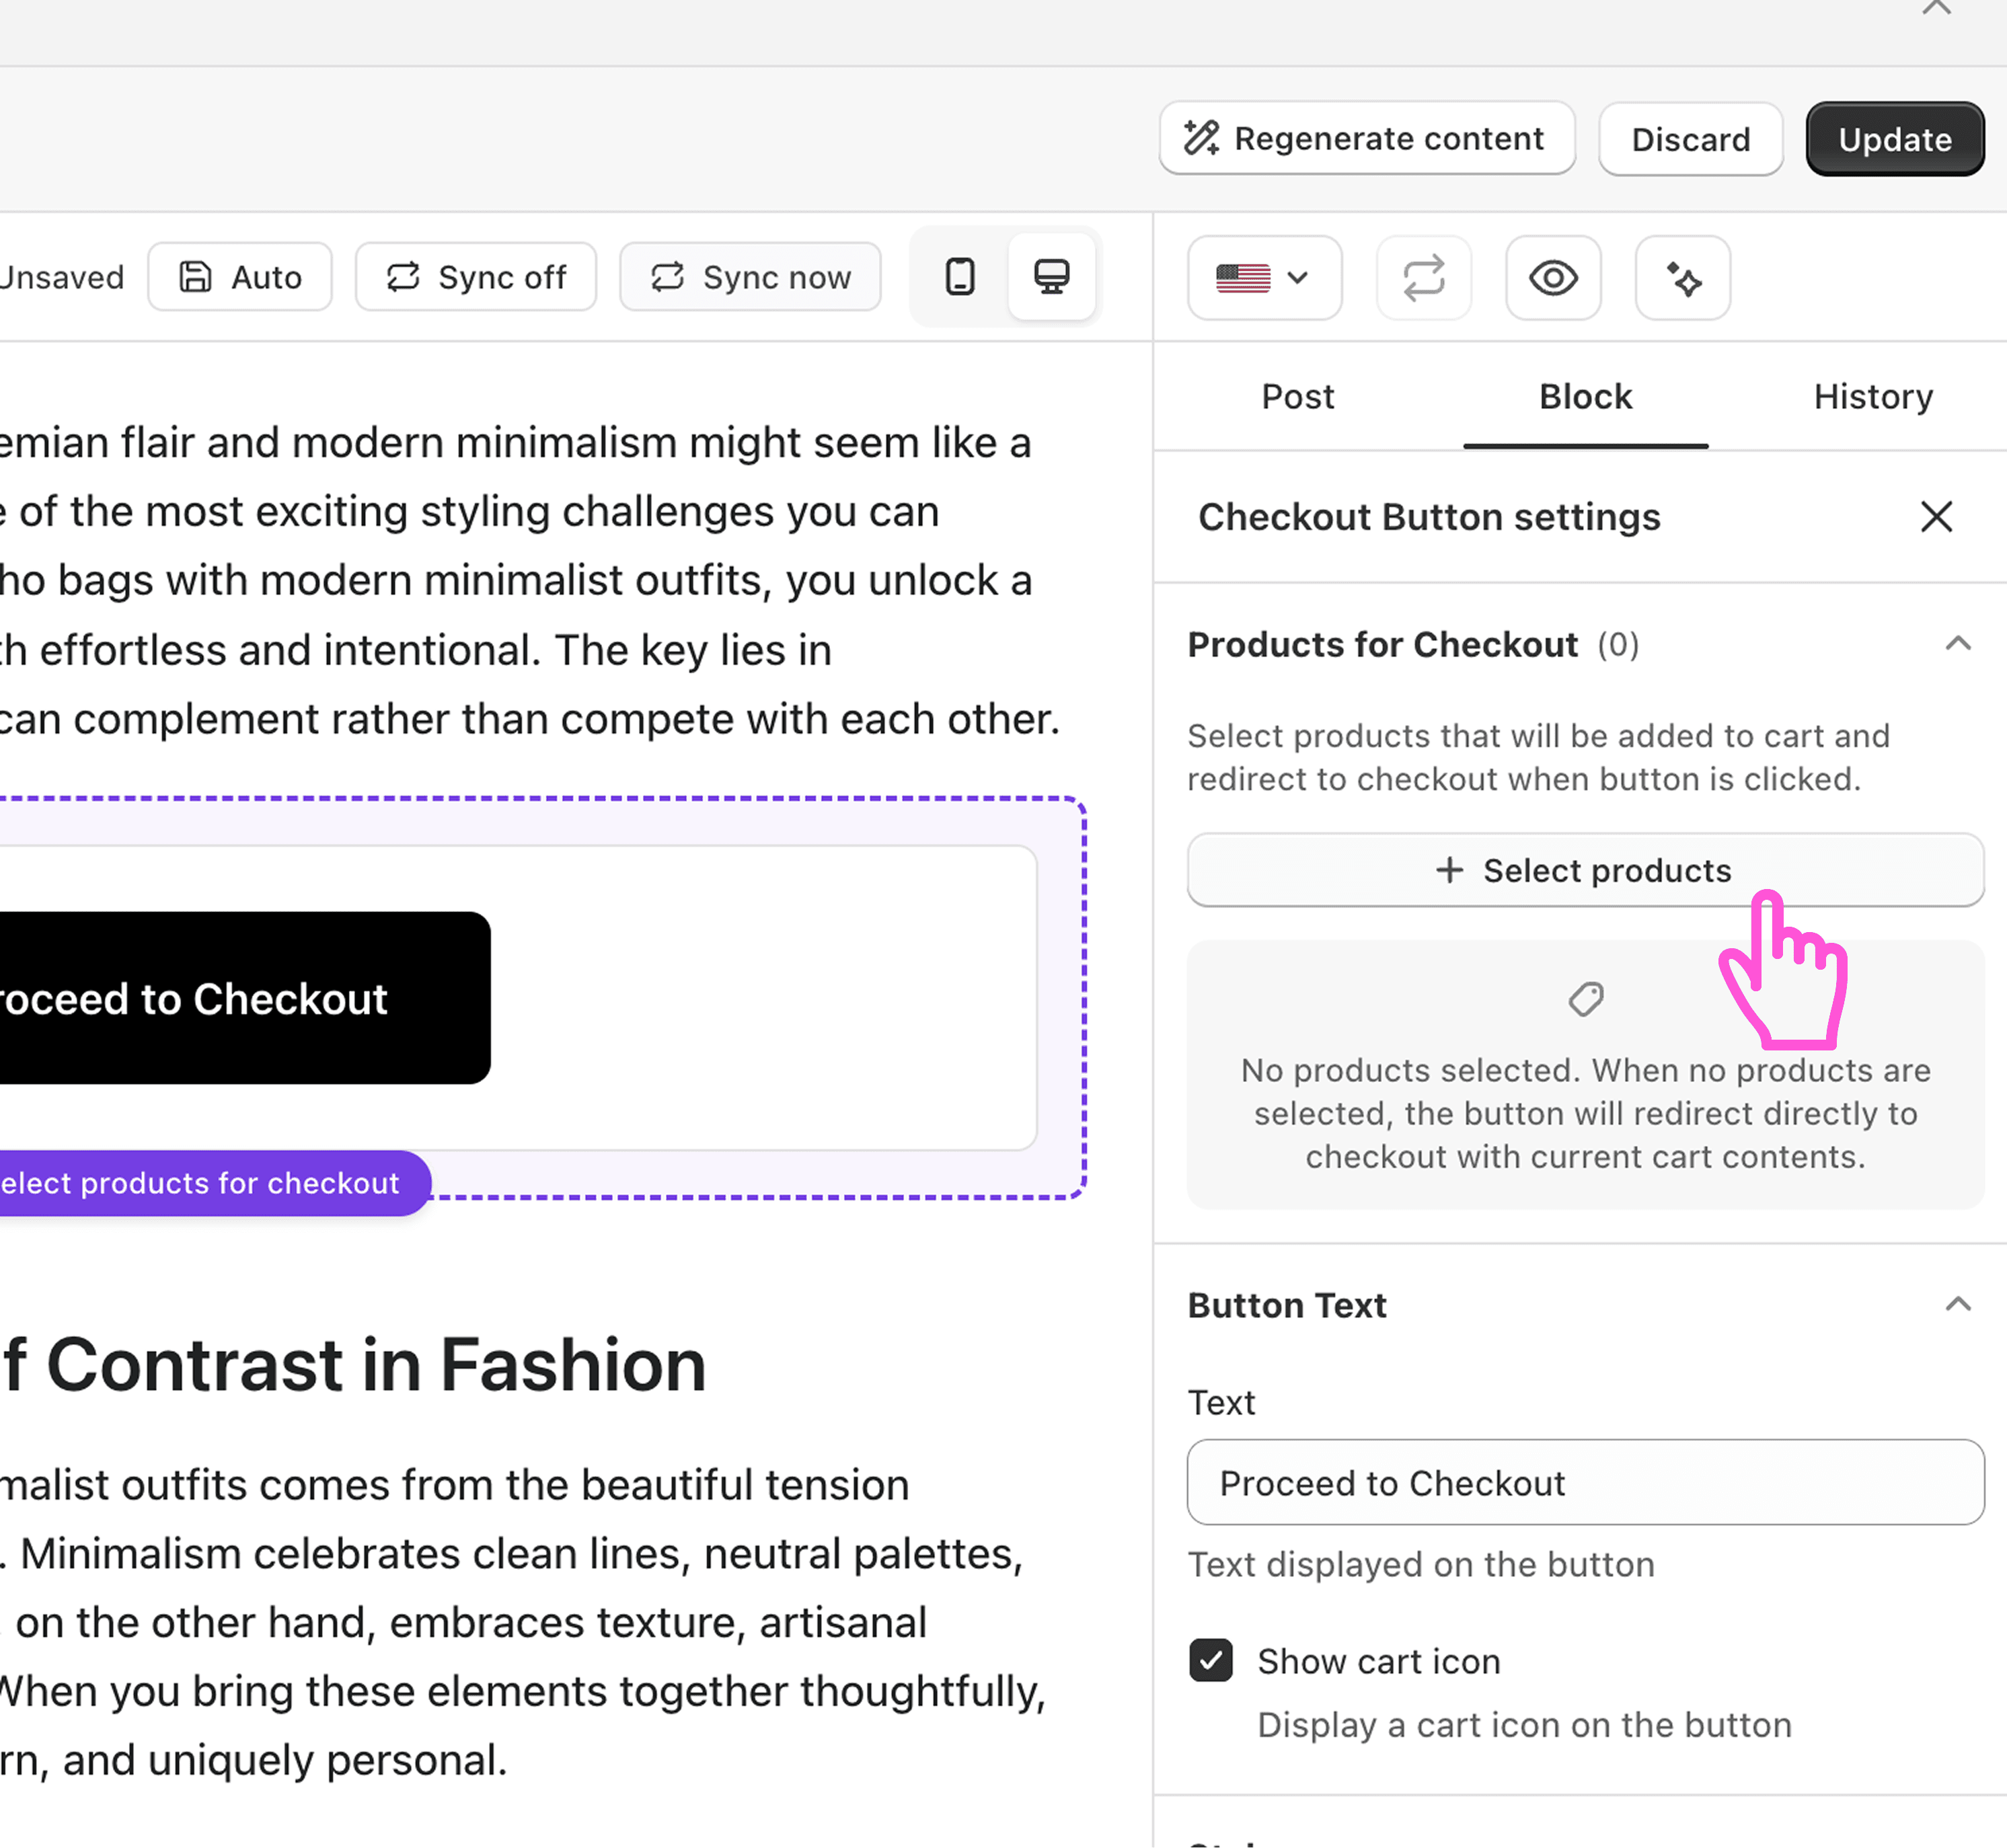
Edit the button text, like "Proceed to Checkout."
Style it: button style, size, color, and alignment.
Save or publish.
What you can customize
Products added to the cart at checkout
Button text and cart icon
Filled or outlined style, size, colors, and corner radius
Full-width option
FAQ
What happens when someone clicks the checkout button? It adds your chosen products to the cart and sends them to checkout. With no products set, it uses the current cart.
Can I show a cart icon on the button? Yes. Turn on "Show cart icon" in the settings.