


How To's
/
How to add multiple products to a blog post in Shopify?
How to add multiple products to a blog post in Shopify?
Learn how to add multipe products in one block in Shopify blog post
3 min read
Beside adding a single product in a blog post, you can embed a group of several products to your blog post with the Blog Builder.

To add the product grid to the posts made in Shopify's own blog editor, you just need to sync the post first on the vevy.ai's dashboard:

How to add a product grid to a Shopify blog post
Open your blog post in the Blog Builder.
In the Elements panel, open E-commerce and find Product Grid.
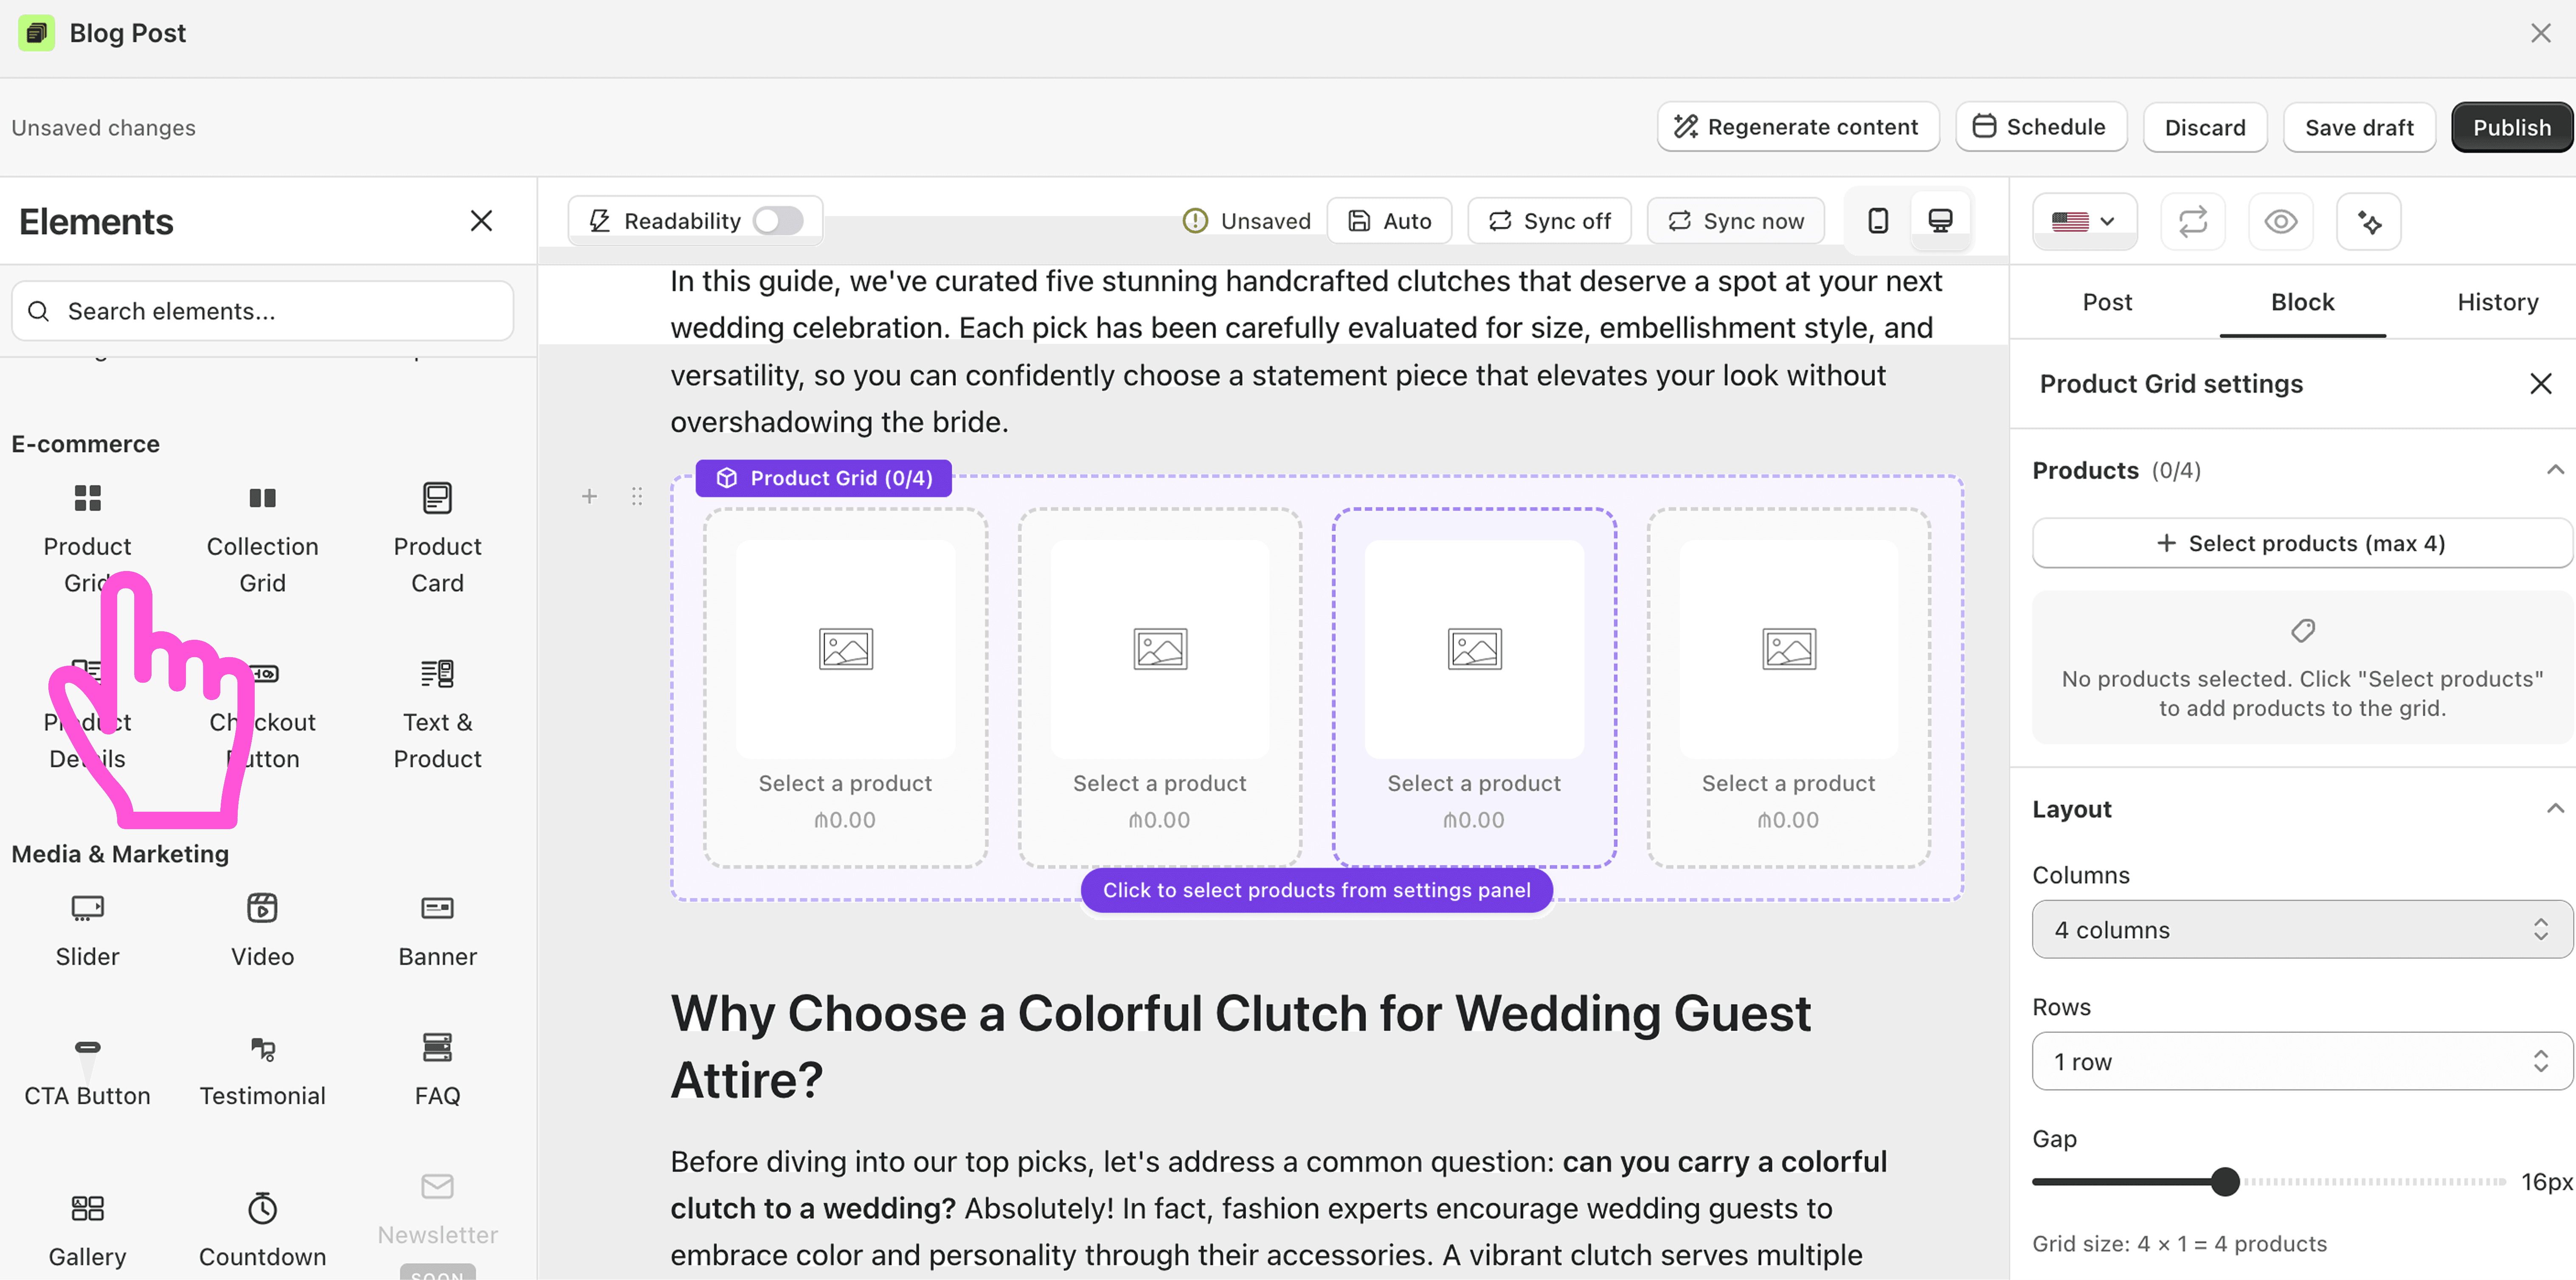
Drag the grid into your post.
Click the block to open its settings on the right.
Click Select products and choose the items you want to feature.
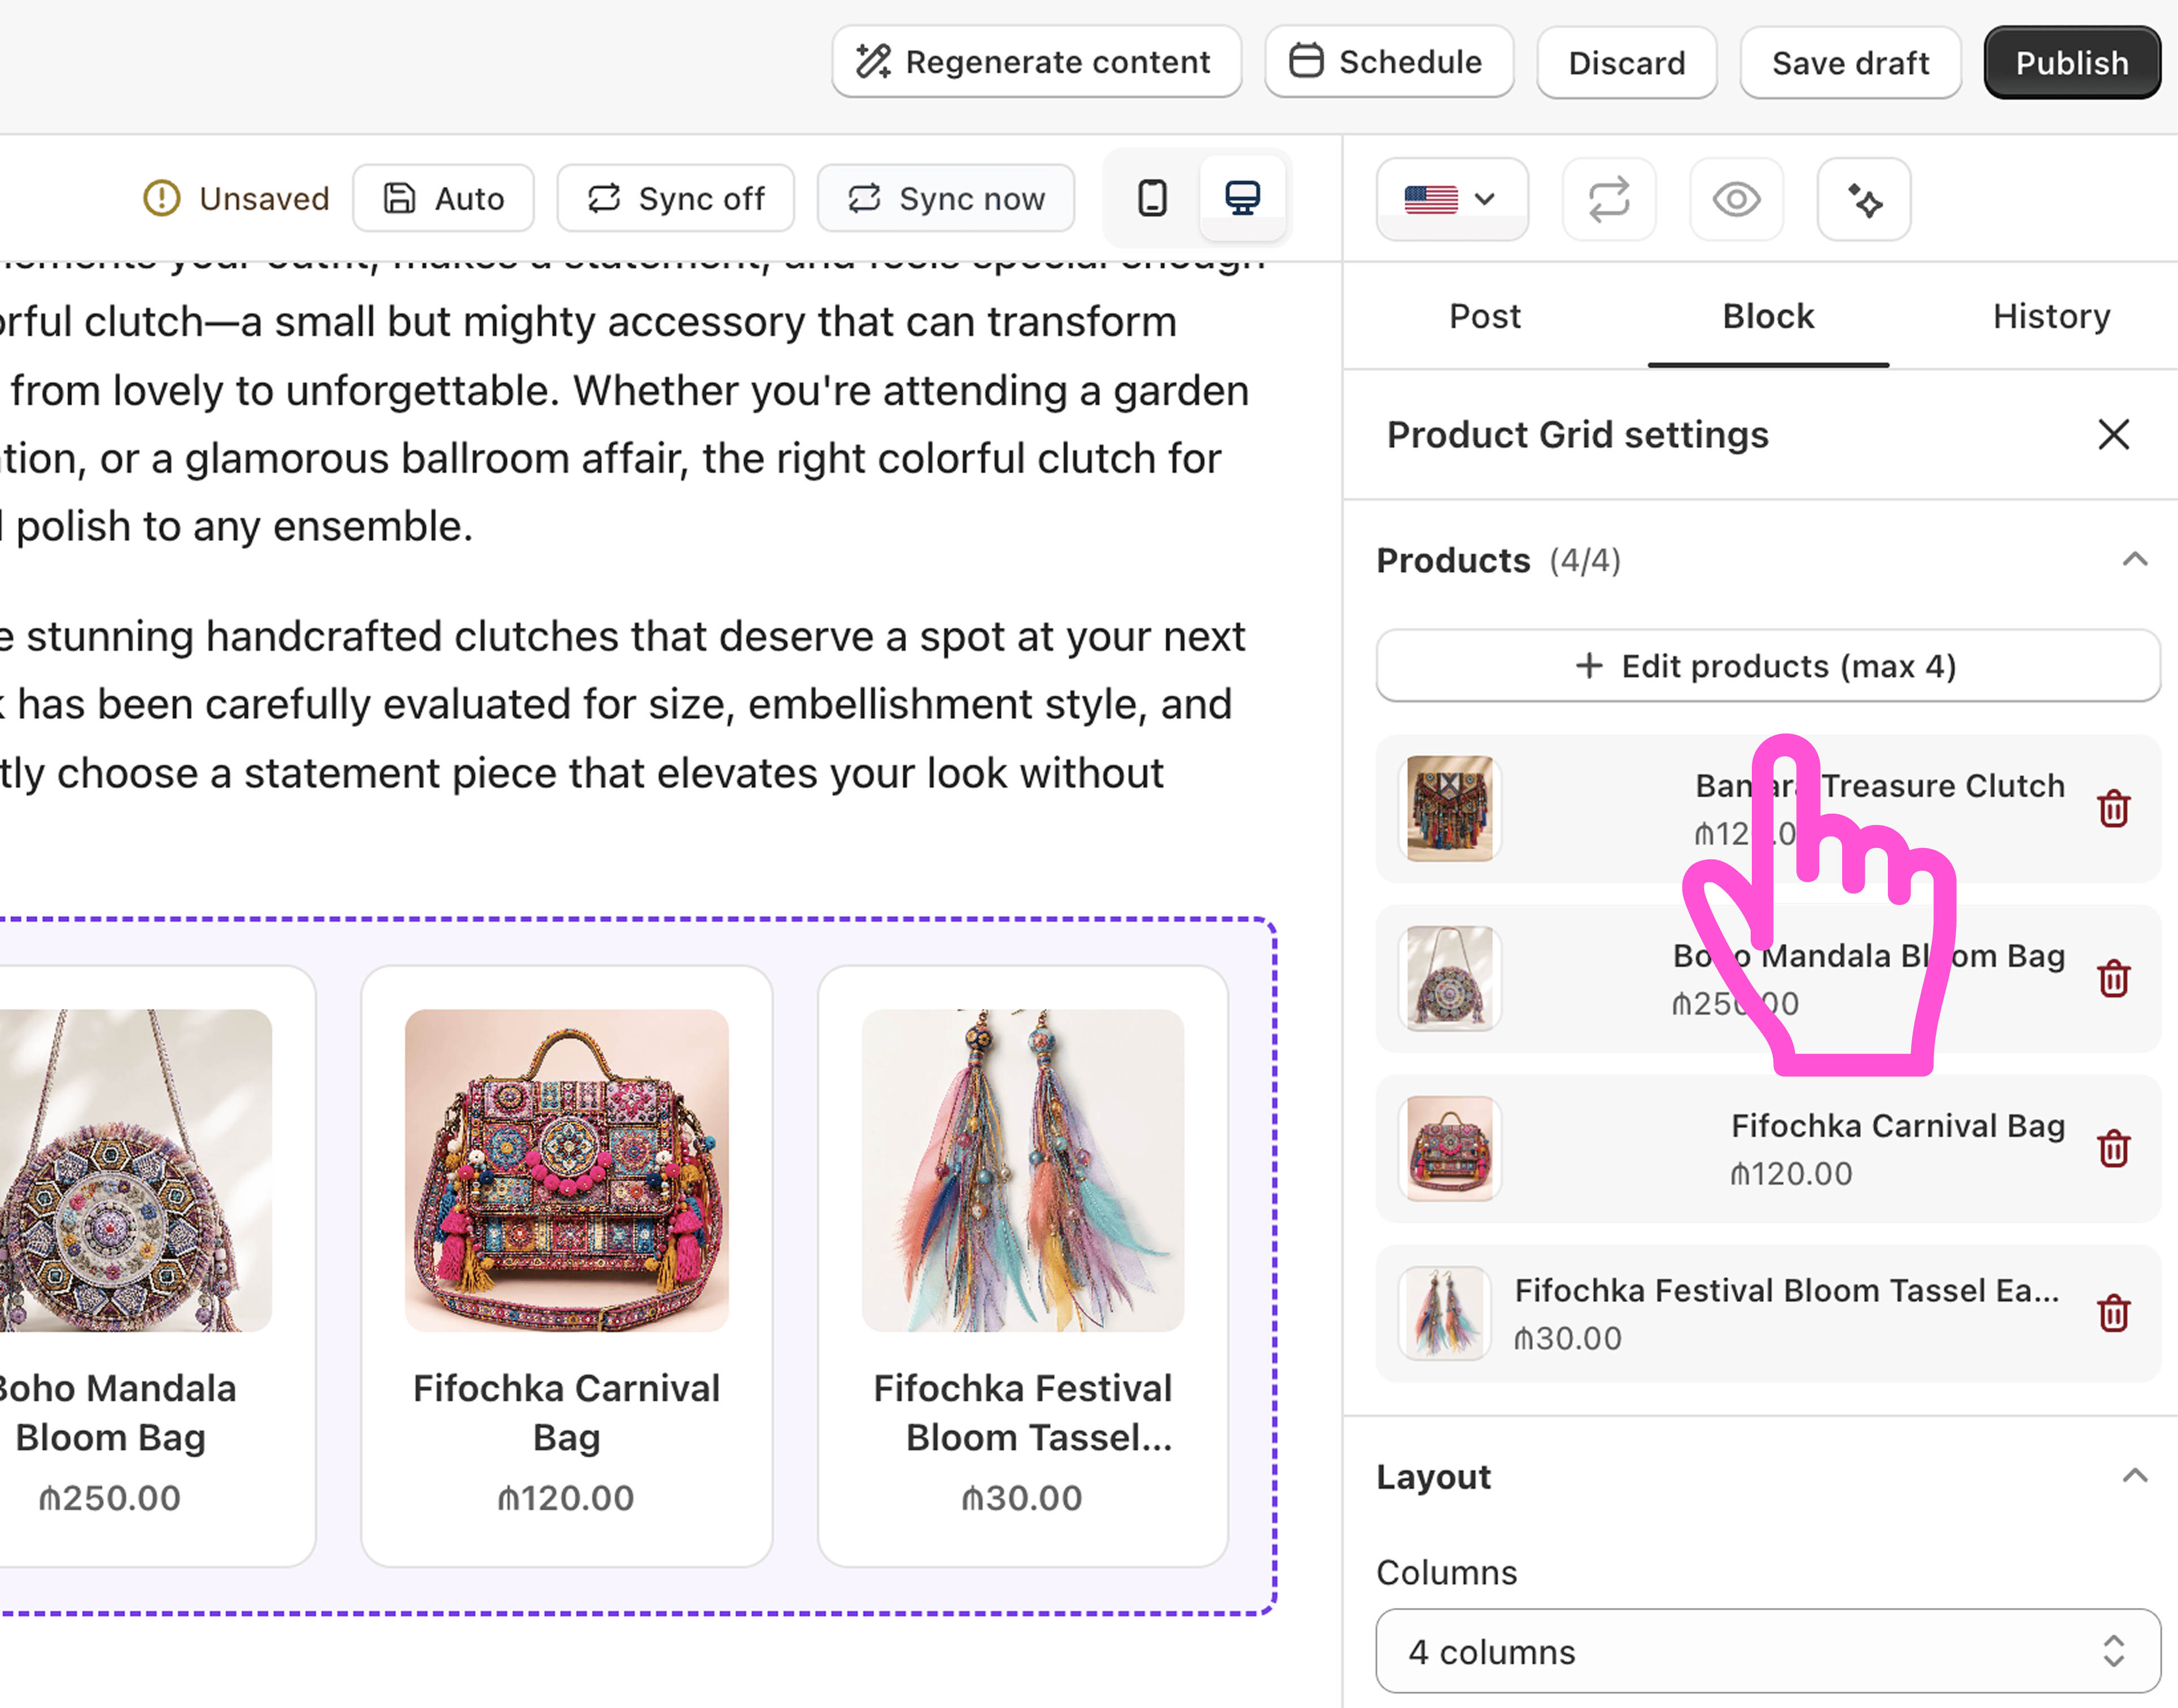
Set your layout: columns, rows, and the gap between products.
Pick what to show, like image, title, and price.
Save or publish your post.
What you can customize
Columns and rows (the grid size sets the product count)
Show or hide image, title, and price
Font sizes for title and price

FAQ
How many products can I add to a product grid? The grid size sets the limit. For example, 4 columns by 1 row holds 4 products. Add more rows for more items.
Can shoppers buy from the grid? Each product links to its page, where shoppers can buy.